One Room Challenge - Wrapping It Up!

Hey y'all! We are almost there, we are almost at the finish line! This One Room Challenge has been just that, a CHALLENGE! Holy guacamole, I never would have thought that this would have been as hard as it has been! Every week has come with it's own set of setbacks and victories! I have so enjoyed sharing them with you week to week! After this challenge is over, I am going to keep this renovation ball rolling and week by week share with you more of my own House Plus Love home and more of my parents! I hope that you will continue on this paint rolling, furniture finding, and transformation happening journey with me! Which brings me back to the challenge at hand! 

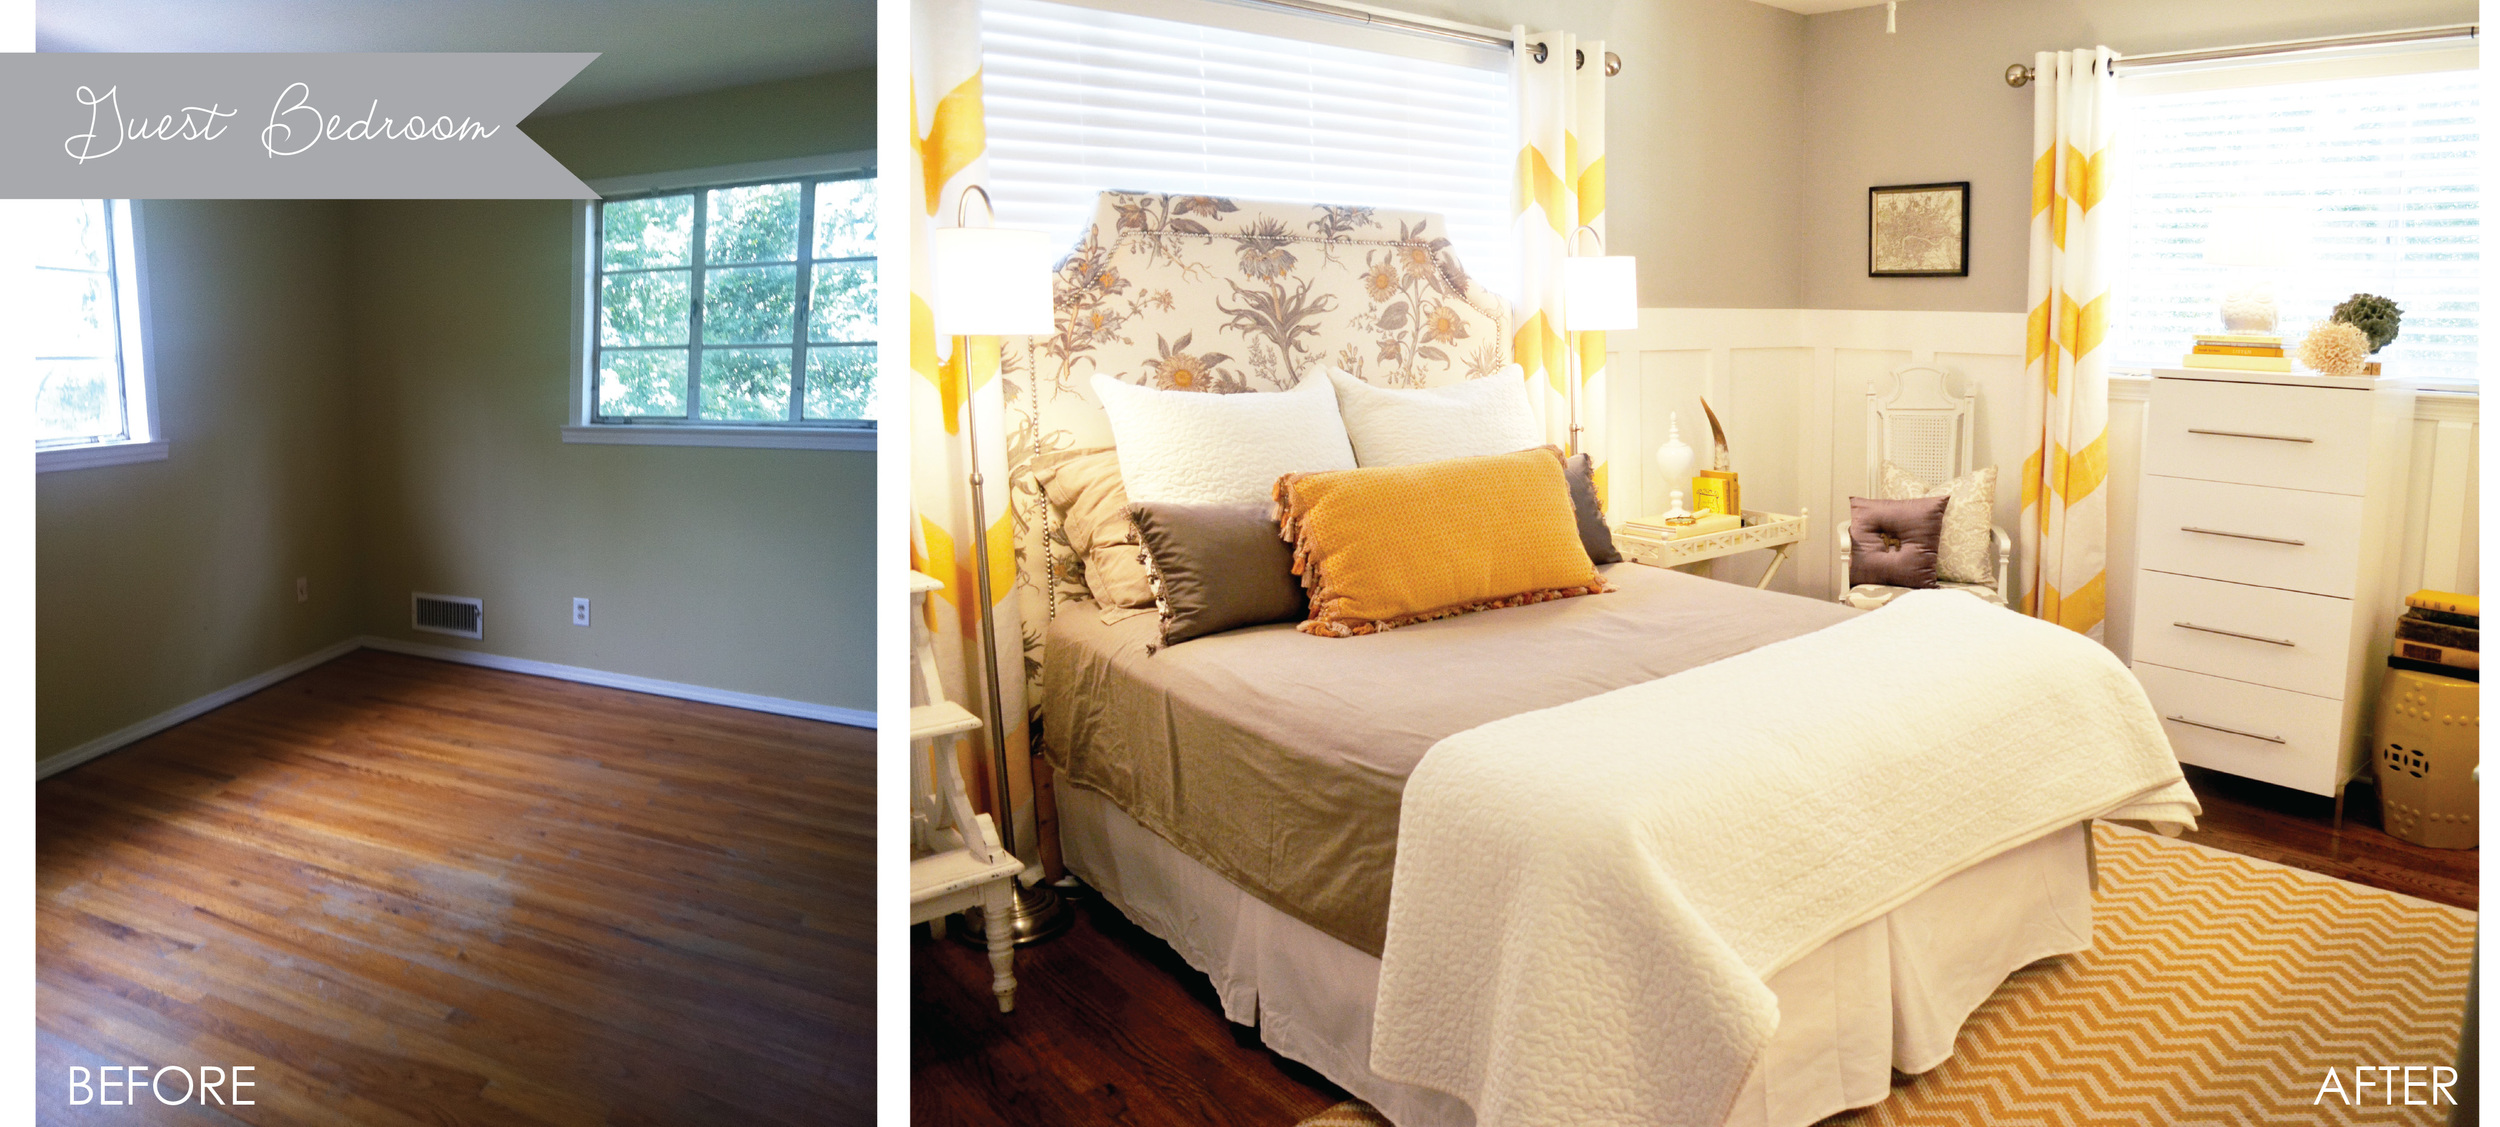
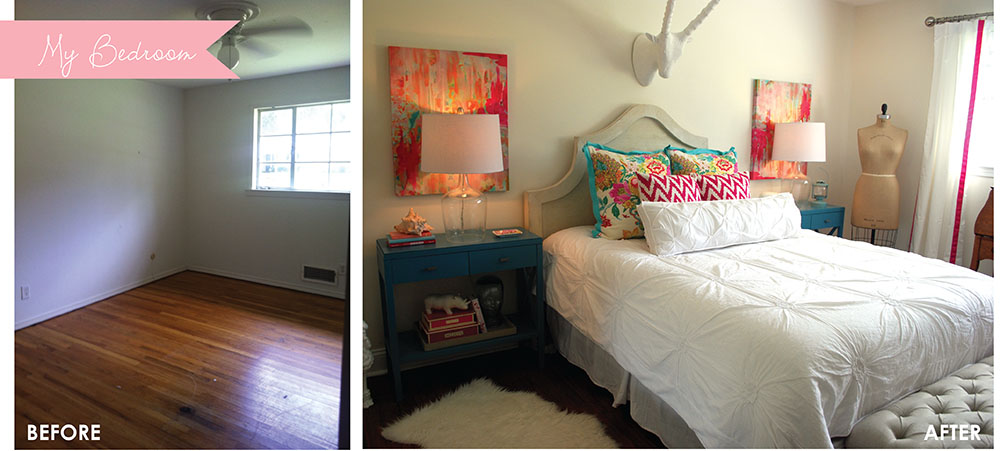
Let's take a stroll down memory lane and remember the good ol' days! The days of pink carpet and a lack luster guest bedroom.  This space is nestled in my parents new home and will be MY room when and if I visit (seriously I am there everyday...but I also only live 5 minutes away, soooo).  Since this was the only space in their new home I could easily stamp with my personality and style, I jumped at the chance to design the room! And when mom gives you the go ahead and states "you can do anything you want" (I am pretty sure that's what I heard...I think), you don't think twice! So their new guest bedroom became my mission!  To refresh your memory here is the dreaded before...

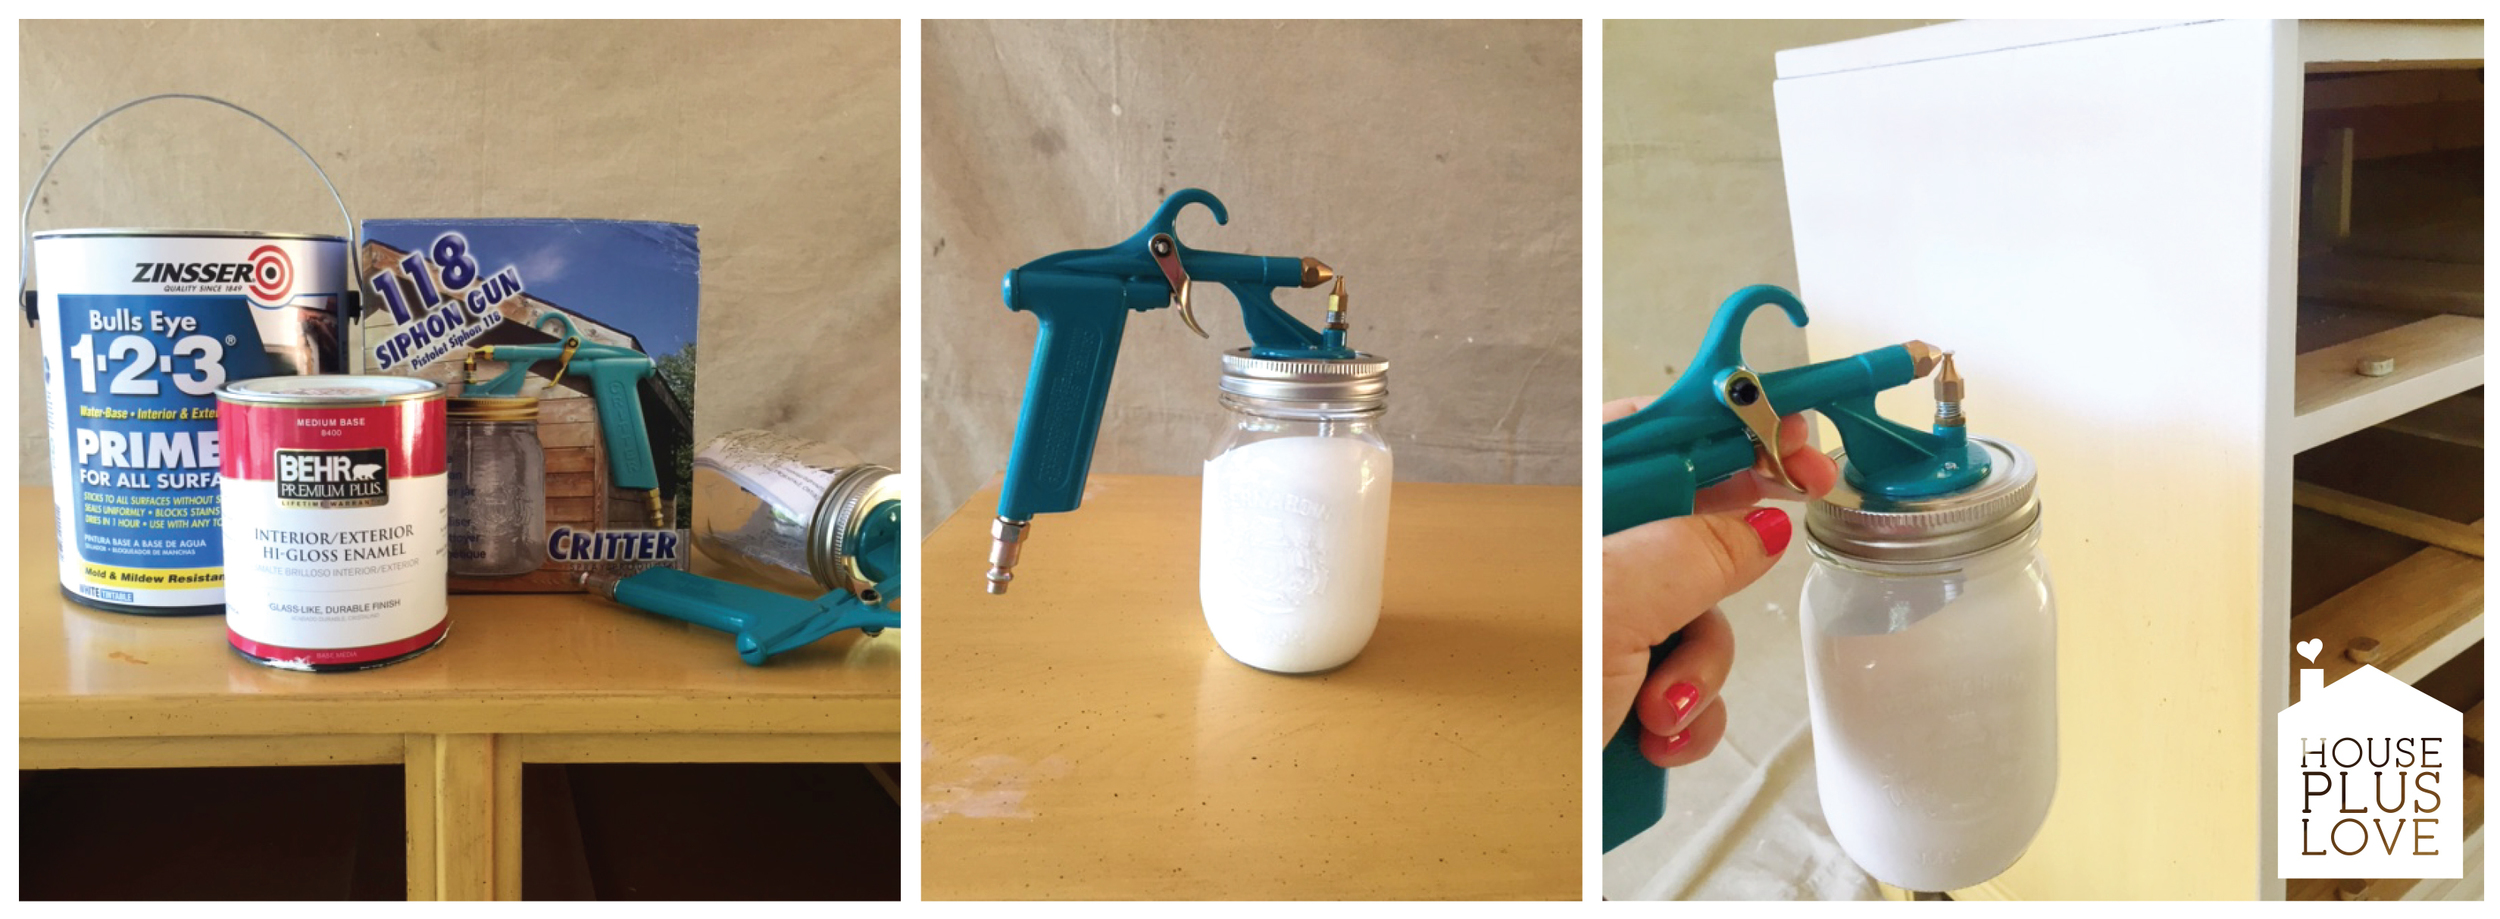
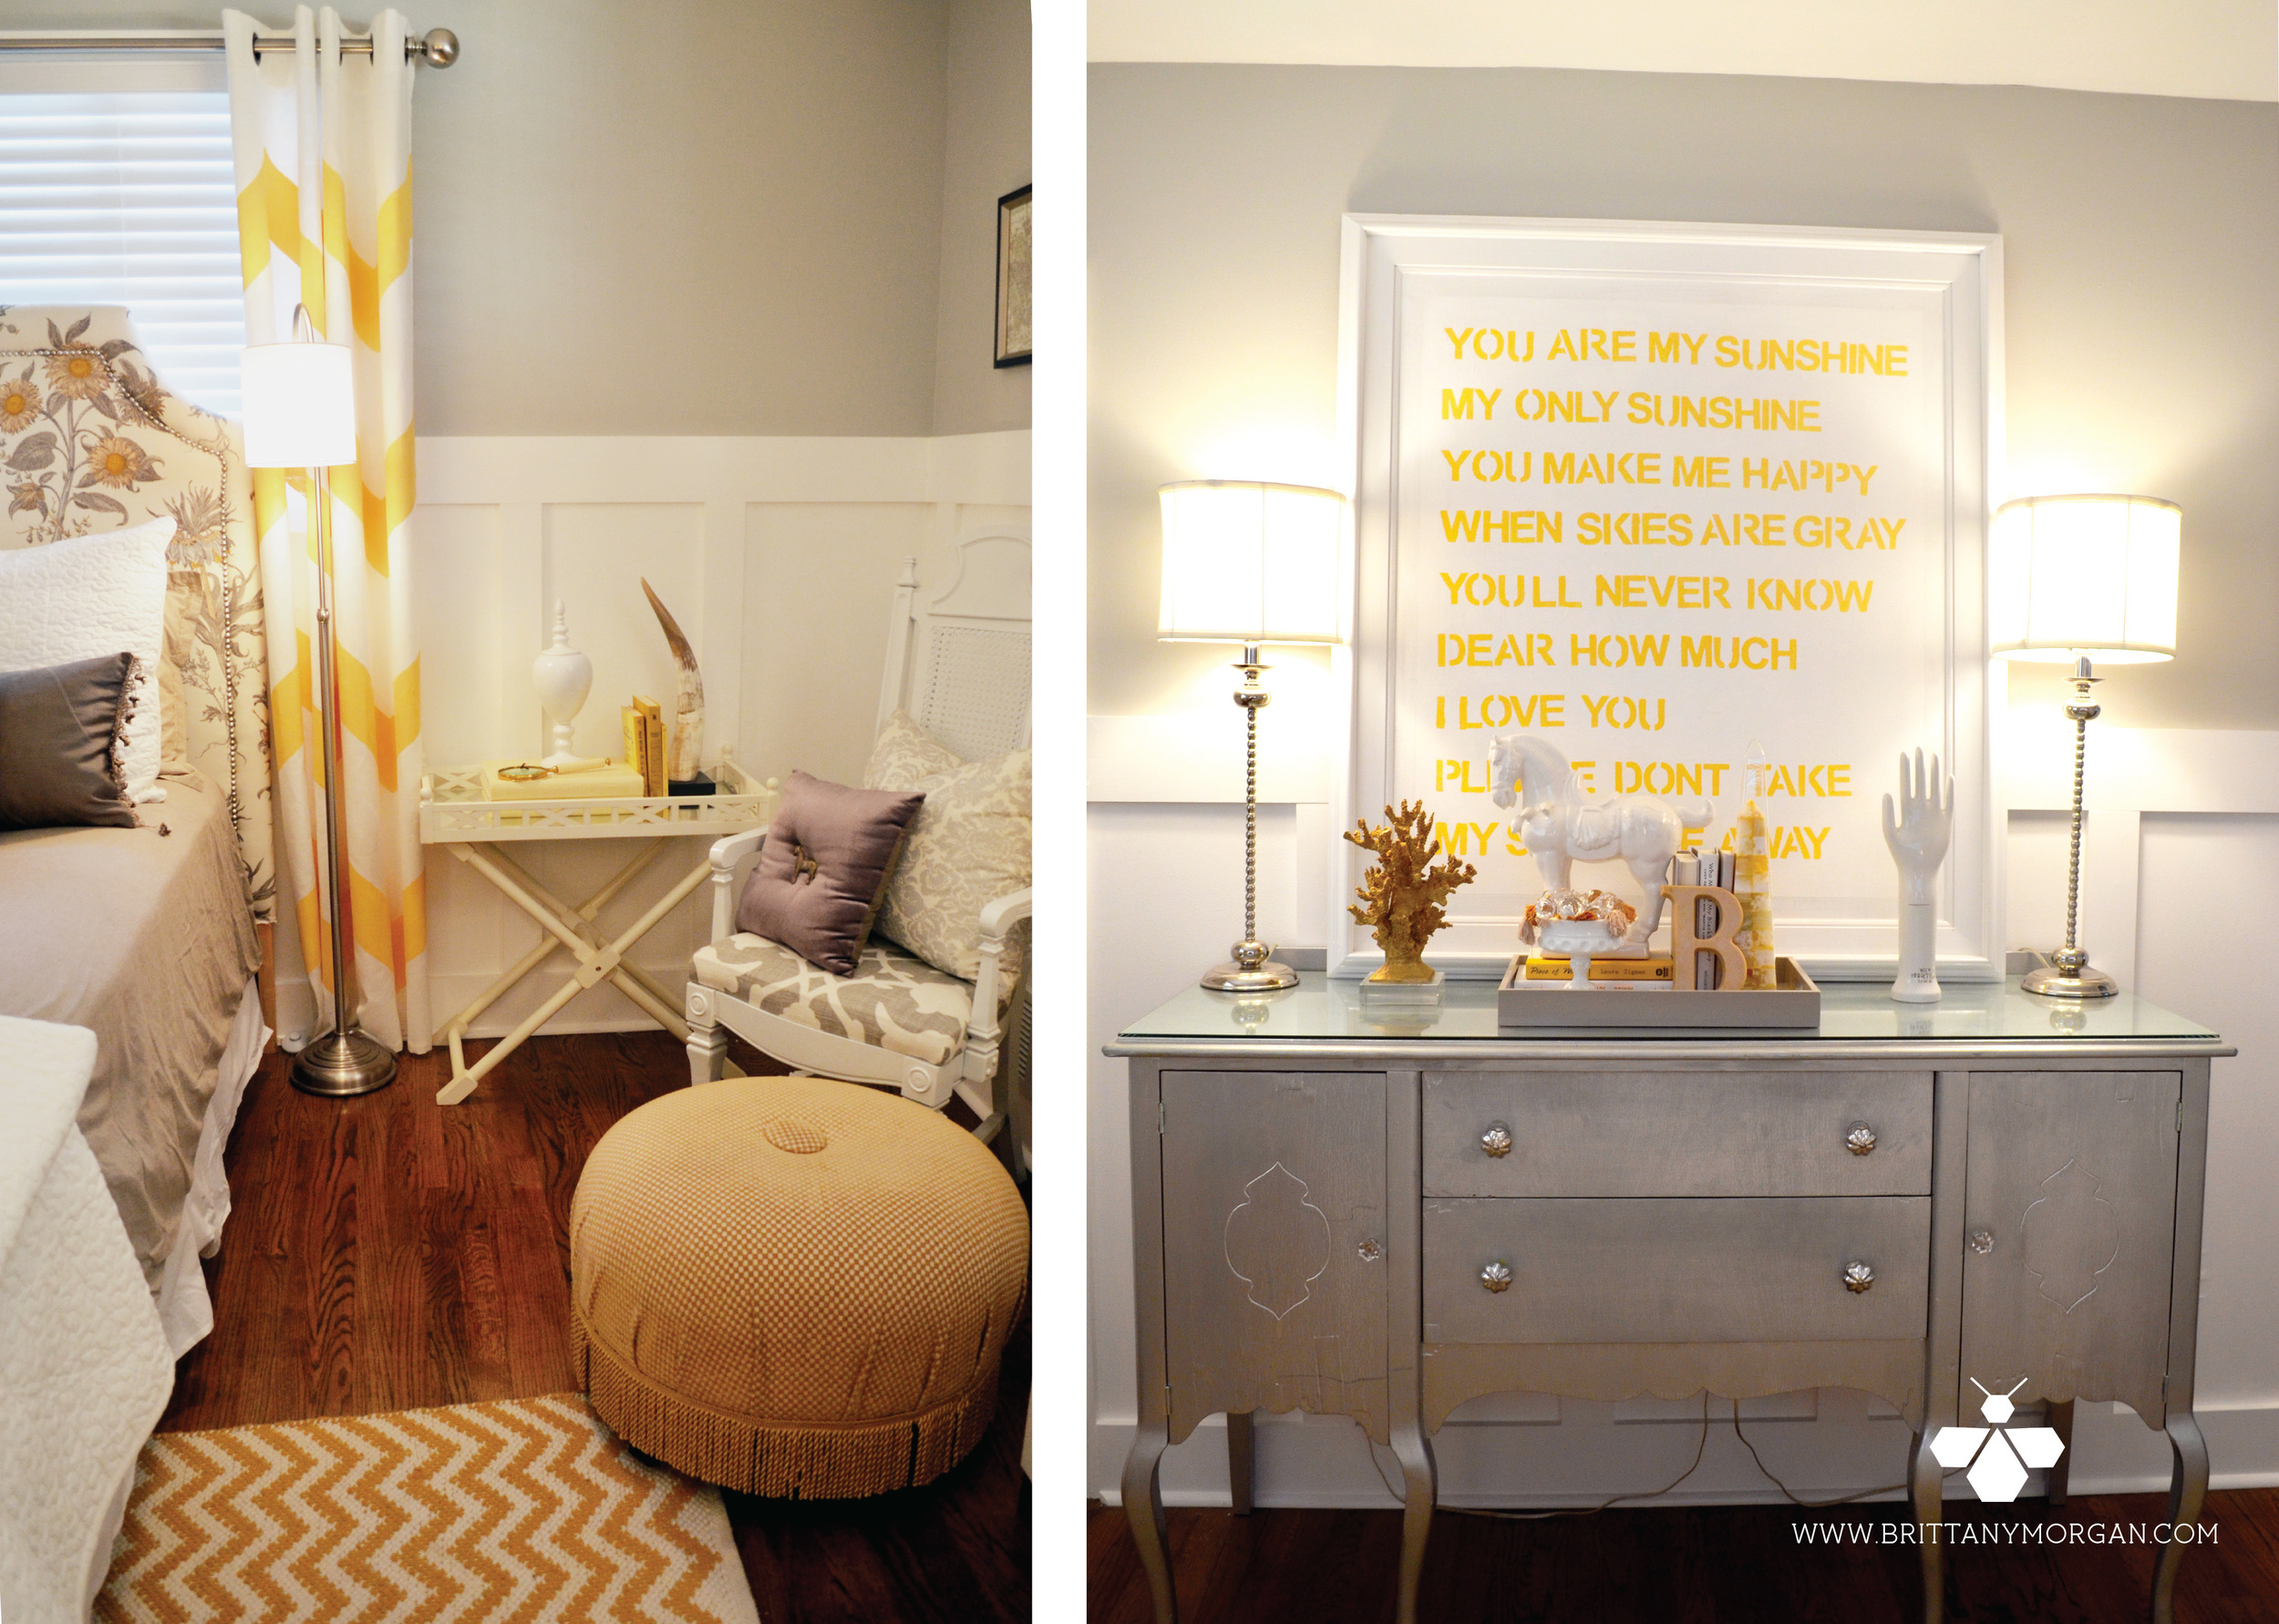
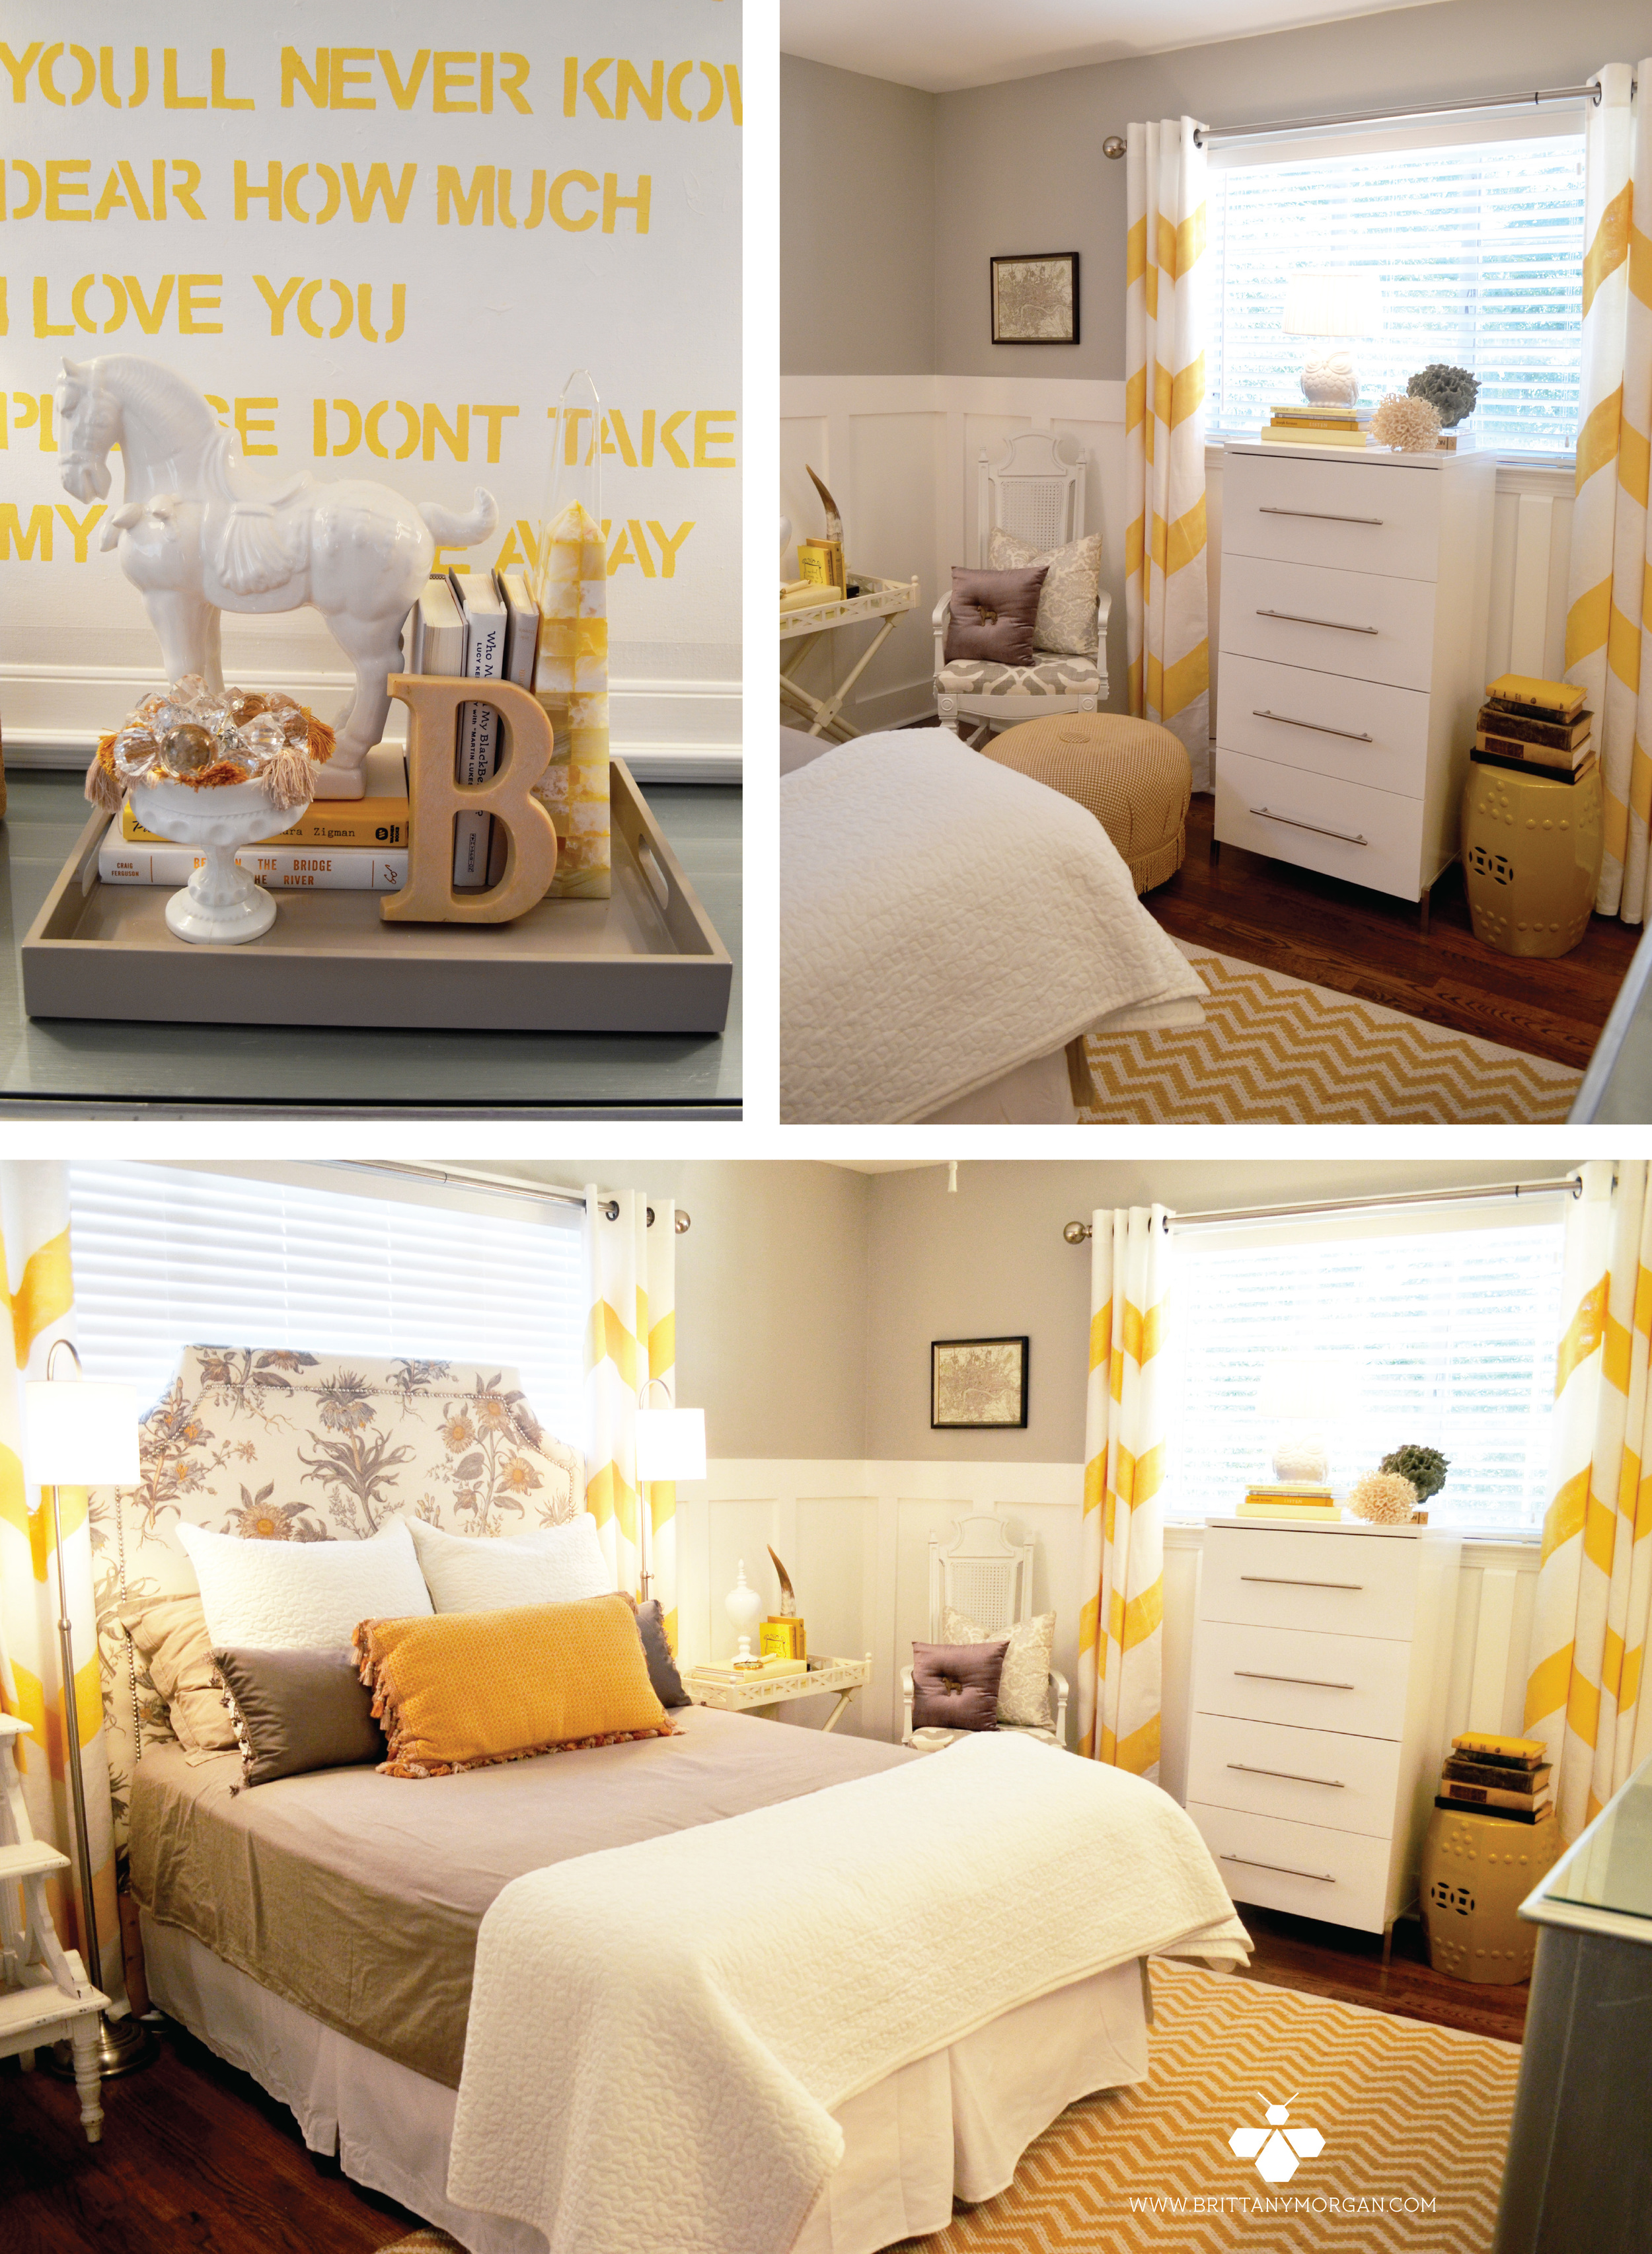
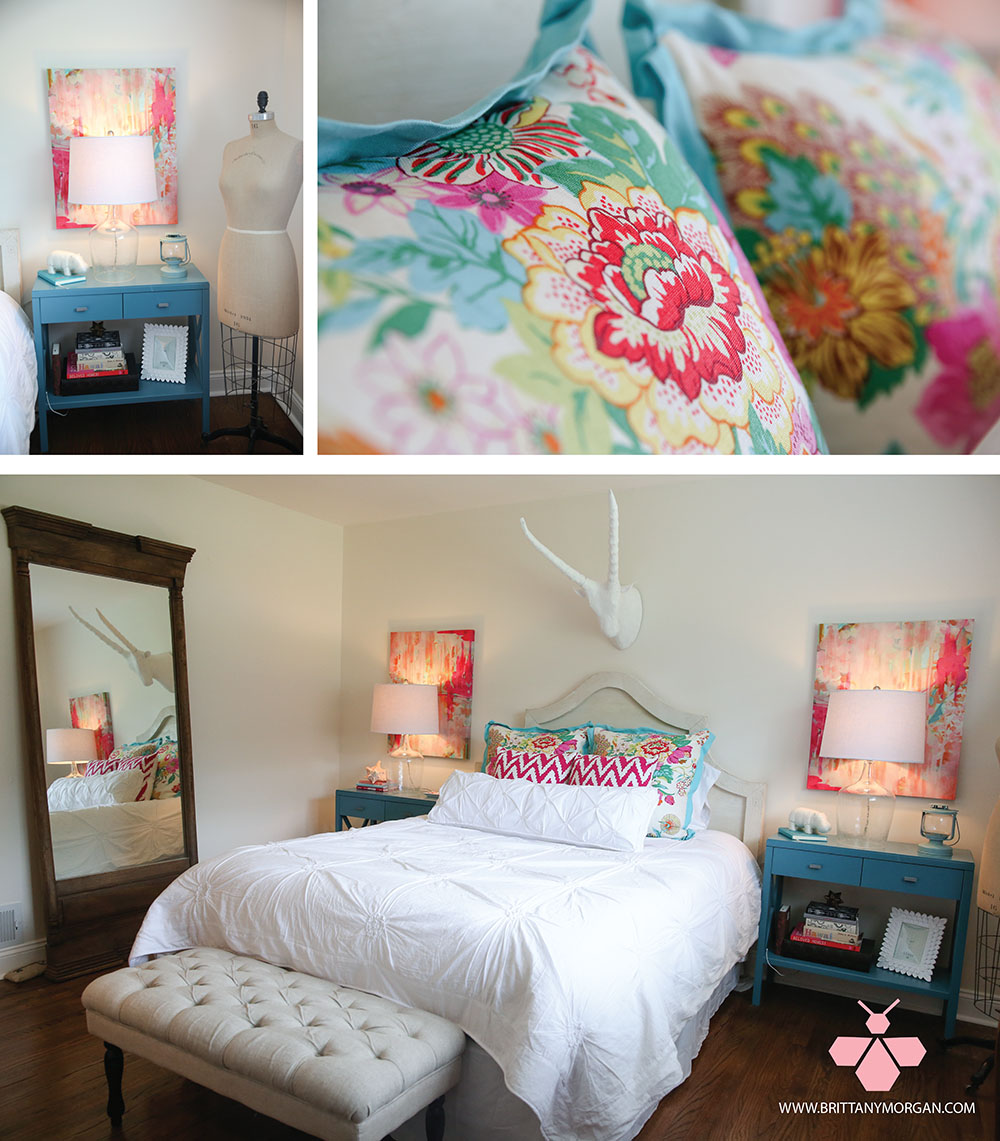
Wowza, we have come a long way since then friend!  Since then we have painted furniture, made custom bedding, shopped til we dropped, changed our minds, and changed them back, all in the name of design!  This past week I finally finished the painted vintage dresser!  I had a little hiccup with the painting process but after consulting with a furniture painting pro, I found the holy grail of glossy furniture when using latex paint!  Enter POLY ACRYLIC in clear gloss...boom, you're welcome! After using my handy dandy sprayer, my high gloss latex paint just was not the sheen I was hoping for.  Once the beautiful turquoise paint dried completely, I painted Poly Acrylic over the entire surface with a fine bristle brush.  It is self-settling, clear, and high gloss.  It worked like a charm! Left me with that glass-like lacquer finish! We got our gloss on y'all! I'm so GLOSSY. You already know. Okay I'm done.  So operation turquoise vintage dresser was a success and DONE! 

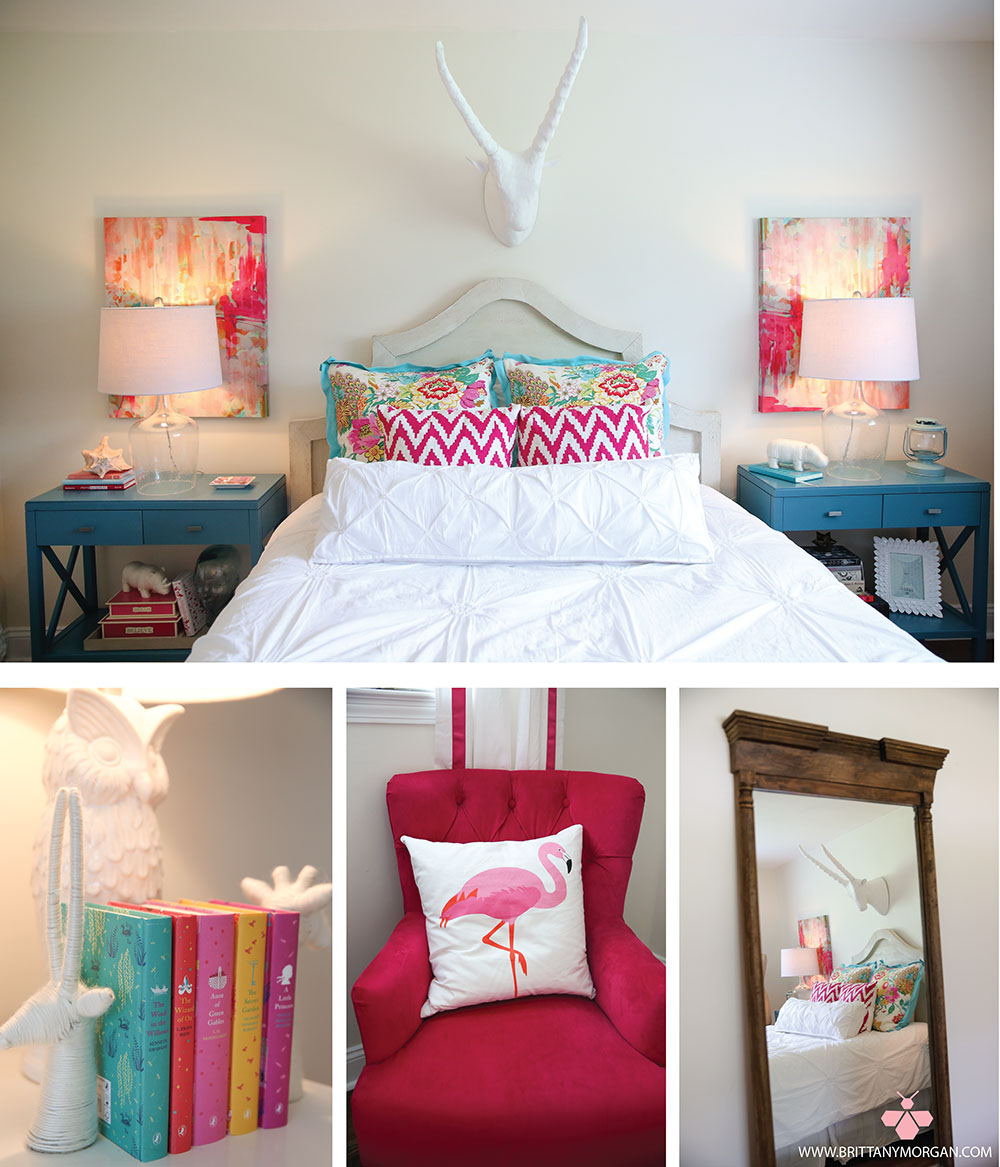
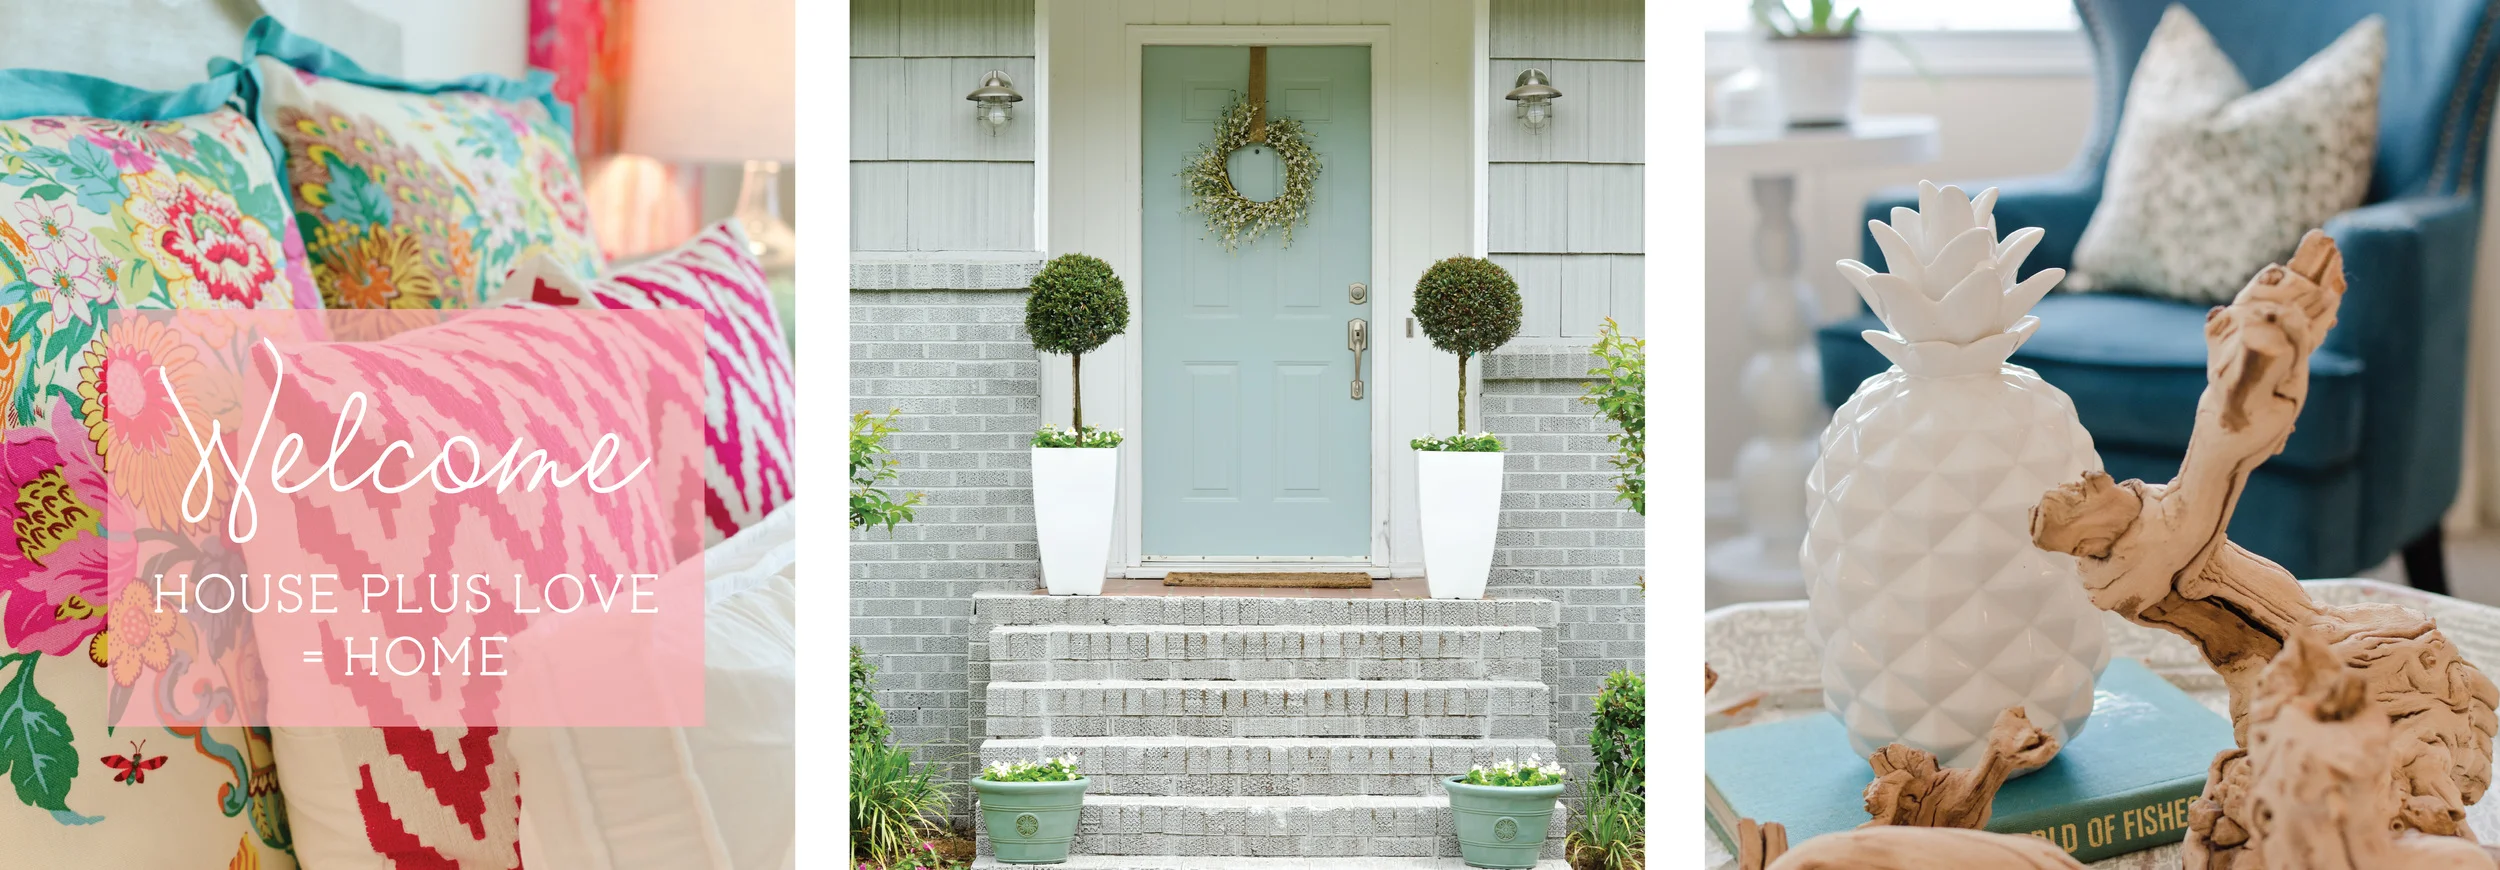
This week we also checked off a few other things on the list! Mom hemmed the curtains from Pottery Barn Teen.  I LOVE these curtains and highly recommend them if you are looking for a ready made drapery! They are velvet but don't look heavy and have blackout lining! I always order longer than I need so you can have them hemmed to the perfect size; giving you that custom made look and giving you the freedom to hang the rod HIGH. Always hang your rod higher than you think! So draperies are hemmed, ironed, and hung...DONE! I also started pulling together accessories! Honestly, this is my favorite part! Accessories are always necessary and can either make or break the space! I am still waiting til the last second to place everything in just the right places because I always love to feel the room out before placing the "jewels" of the space! 

So what's left to do? I still am on the hunt for the perfect lamps! I need 2 sets.  I have options, they just aren't speaking to me yet (if they ever do actually speak, y'all can take me to the loony bin).  Anywho, lamps. Must find lamps.  Secondly, I need to finally pull/cut off all the painters tape.  Because why in the world have I managed to wait til now!  I have to rope my Dad into raising the headboard.  I have to make a final decision about art/shelf on large blank wall and hang it!  And lastly, I need to style the space and take awesome photos so I can blow y'all away next week! Here's a little sneak peek for ya! 

So that's it folks! We are so close I can taste it! I can't wait to show this one to you! Thank you all so so much for following along on this journey with me! I have so enjoyed see new faces around these parts! 

You can look back at all my One Room Challenge posts here: Week 1, Week 2, Week 3, Week 4

As always, join all the fun by checking out the featured designers this week! I am blown away by these spaces!! I am so excited to see all the beauty that awaits us next week!! And also be sure to join in on the other guests participants...so much goodness happening there!! Thanks for tuning in this week!! Hugs! 


Source: https://brittany-fleming-8vou.squarespace....

One Room Challenge - Fabric Focus and The Vintage Dresser

Hello everyone! It is week FOUR of the One Room Challenge and somehow I am still alive! This week has been a tough one! It was a week of progress, set backs, and changes! You'll remember this is where we started...with a lifeless and dated guest bedroom in my parents new home.  Snooze fest! Well I have certainly given the space some life over the past 4 weeks! You can read week 2 and week 3 posts to get up to speed on where I am taking this room and how far it has come! Let's get started on where I am in week 4...

This room is becoming the space all about FABRIC! My fabric choices are bold, bright, and happy! The dark chinoiserie fabric I choose for the bedskirt and euro pillows are a large part of the design and make a huge impact in the room. It has really driven the rest of the design decisions. With a mostly all cream space, I felt the room could handle the bold fabric and decided on making the bedskirt and pillows POP! I think this beautiful fabric does just that! So I was excited to get the custom made items back from the seamstress this week! As soon as they hit the bed, I knew it was just right! I decided to keep the boldness train going and choose this gorgeous brown and cream lattice patterned fabric for coordinating pillows and the cushion for the chair! And why not have hot pink cording sewn around all the edges! I actually picked these finished beauties up today! I am loving the look!! 

ORC House Plus Love Bed Fabric

Isn't it all just wonderful!! I am a fabric and pillow nerd! I love it all...but this combo makes my heart skip a beat! The new cushion on the little rattan chair makes this vintage cutie I picked up for $59 a stand out in the space! I got to get to fixing the unraveling spots though...note to self: add that to the to-do list! 

ORC House Plus Love Bed and Chair Fabric

Now for the little dresser that could! You'll remember that the hunt for the perfect vintage dresser was a difficult one but then my luck turned and I stumbled across this one, it's matching headboard, side table, and arm chair all for...TWO HUNDRED dollars! What the what?! Yes please! So needless to say, this dresser was a steal!! The lines on this one are amazing! It was cute in the original yellow, but it wasn't in the best condition and I had my heart set on a turquoise dresser! 

ORC House Plus Love vintage dresser

So I set out on painting the dresser myself! Sounds easy enough! I was going for a high gloss lacquer look in a specific Benjamin Moore color.  I should have researched this more before starting but I got too anxious and figured I knew what I was doing! I have a small hand sprayer which can be found here! This would be the first time I was using it and I was excited to get started! I first took all the hardware off and took all the drawers out to start with the base. The top of the dresser had a piece of glass glued to it...cute guys.  So I got my Dad to pry it off and used rubbing alcohol and a paint scraper to get the goo off! I cleaned the entire piece and setup my new sprayer for the first step... PRIMER!

ORC House Plus Love dresser 1

My little hand sprayer is called a Critter and runs off an air compressor.  I first found out about it from another design blog years ago and finally got one for Christmas this year! SO I decided to give this bad boy a try! I loaded the primer into the spray gun and sprayed away! It went on super easy and after 2 coats of primer in about 20 mins...I was stoked! This was too easy it scared me!

ORC House Plus Love dresser 2

Next up came the final chosen turquoise color! I originally had selected Oceanic Teal by Benjamin Moore.  But after much contemplation, finally landed on Spirit in the Sky by Benjamin Moore.  It is just a tad more subtle than the original color and I like it so much better! So I loaded up the turquoise paint and got to spraying.  Again, the sprayer did just fine and made it go super quick! The only down fall on this guy, is that the spray radius is small which makes getting perfectly even strokes difficult.  This little hiccup caused me to go over the dresser a million times!! I question if there is something I am missing there and a better system I am unaware of.  I am willing to give this little sprayer another try on something else, but for now it did the job good enough...for now.  WELL, here comes the set back! The paint I selected was in a high gloss finish which I thought would translate well with spraying.  But it simply did not.  The finish product is not shiny at all.  Bummer.  I texted a good friend of mine who knows all too much about painting furniture and he made a suggestion that I will be trying out this weekend after the rain drys up here on the Gulf Coast! So needless to say the dresser is not done as planned!! I got my fingers crossed for next week and will hopefully give you a positive outcome!! Here's to a happy ending on that one! 

ORC House Plus Love dresser 3

More and more pretties keep arriving and finding their way into the room! It is slowly starting to come together! I changed my plan for the ottoman at the end of the bed and relocated the other turquoise bench! I decided on TWO gold metal x-legged turquoise stools.  I think they make a better fit...heart eyes!! Here is a peek into how it is coming together!  

ORC House Plus Love room update
ORC House Plus Love room update 2

Oh hello there fur assistant, Lucy! She wants to be a model so bad...I keep telling her the lifestyle isn't worth it.  So there you have it!! Week 4 down...one more to go before the big REVEAL! Holy guacamole...not sure if I am ready for that! I hope y'all have been following along the featured designers from this event...here is week 4! Everyone's spaces are so beautiful and inspiring!! Be sure to check out the lovely Paige Minear's blog this week on how she is using our very own House Plus Love design planner to help her create her space! And for sure check out all the other guest participants for ALL the linking fun

Source: https://mail.google.com/mail/u/0/#inbox

One Room Challenge - The Thrill of the Hunt

Hello there friends! Thanks so much for following along with me on this One Room Challenge journey! I can't believe it, but we are at the half way mark! WHOA OH. WE'RE HALF WAY THERE! WHOA OH. WE'RE LIVING ON A PRAYER! Am I right though?! Ahahaha! Last week you'll remember that I was able to get the trim painted white and the new hardwood flooring installed! Hooray! And here is a little flashback to remind you where we started!! 

ORC- House Plus Love Before

Oh man, I had almost forgotten about that glorious pink carpet! Praise the Lord those are only fading memories of the past! So now with the walls and floors done, this week I was able to focus on hunting for the perfect pieces for the space! There were a few items that I just knew I wanted for the space and they simply needed to be ordered from some of my favorite online sources!! Don't you just love online shopping these days! Here is a look at the pieces that were ordered and where to find them! 

ORC House Plus Love Online Orders

Here's the shopping list: 

  1. White Linen Headboard - Overstock $279.99 - Loved the idea of a white/cream headboard with pops of color! 
  2. Natural Sisal Rug - Overstock $261.79 - I always love a good sisal rug! I particularly like this one! It is similar to one of my favorites from Pottery Barn but without the price tag. 
  3. Cream Dot Coverlet- Urban Outfitters $189 - It really is the CUTEST thing in person! Adds texture and charm! 
  4. Toe Cleavage by Susan Skelley- Gilt $115 - Apparently it is sold out! Glad I scooped it up when I did! 
  5. Flamingo II framed print- One King's Lane $159 LOVE Flamingos! I feel like this is an upscale version! 
  6. Gold Metal Hammered Side Table- Waiting on Martha $429 - I actually carry these tables in the House Plus Love retail space in Mobile, AL, but here is where you can find them online! We are hoping to carry them online very soon! 

I searched and searched online through some of my favorite shopping spots and these quickly made the wish list! Overstock is really one of my secret weapons for online shopping! They often have great looking pieces for a lower sticker price! They are also similar to an online Homegoods...their stock is always changing, so you have to keep checking in with fingers crossed! I LOVE the hunt of it all! One King's Lane is also a go to when working on a project! Their selection is amazing! And they offer vintage finds that are always to die for! Urban Outfitters is another good place to search for unique home wares! I stumbled across the coverlet on their site and immediately fell in love! Waiting on Martha has impeccable style making it an easy online shopping experience! Gilt is actually new to me! But after scoring this gorgeous painting...I'll be back! So there you have it! My online finds have officially been ordered and several have already come in and settled into the space! 

After nailing down these essentials I hunted online, I knew I wanted to add in several vintage elements! I love antique and vintage furniture! My personal style is mixing the old with new! I like to say that I design with a nod to traditional but with a modern, youthful twist! So I first got to hunting out a vintage dresser! I had an idea in mind of what I was looking for, but part of the thrill is not knowing exactly what you will find! And often what you end up finding is better than you imagined! That certainly happened with the dresser! After making a visit to my favorite local antique shops and estate sales, I was in no luck with operation vintage dresser! Then I popped in a large vintage shop I had been wanting to visit in Fairhope, AL, and the vintage furniture gods rained down their goodness upon me! As soon as I saw this piece, it was as if the aisles parted and the angels sang! Glorious!! There it was in it's furniture goodness! Not only was it exactly what I was looking for, it also included a chair, table, and headboard for a grand total of $200!! SOLD...here take my money! So all the things came home with me that day!! On the list for the coming week is to get this beauty painted! I have settled on a beautiful turquoise color by Benjamin Moore called Oceanic Teal.  Can't wait to share this mini transformation with you next week! 

ORC House Plus Love Dresser

The dresser was a major score, but I also was able to pick up a cute little rattan chair for only $59!! Yep...you read that right! I am going to simply clean this little guy up a bit and have the cushion recovered! I think leaving it in the natural rattan will be a fun element for the space and also tie in the natural color of the sisal rug! I decided on a gorgeous brown and cream graphic fabric with hot pink piping! The fabric and cushion are making their way to my trusted seamstress today! I can't wait to see this one come together!! 

ORC House Plus Love Chair

Lastly, I made frequent visits to my all time favorite place to hunt for finds...HOMEGOODS! The land of my people! I was able to pick up this super cute gold Moroccan pouf, white ceramic lamps, and turquoise upholstered bench.  I am still a tad unsure of the white lamps...still on the hunt for a pair that makes my heart skip a beat! I am also unsure about the bench! I have my eye on something different! I also walked down the hall and stole the teal and cream zebra rug from my mother's bedroom! Haha! Calm down, before you jump to conclusions...she ordered it for her bedroom and it just wasn't the right feel.  We BOTH decided it would be better for the guest bedroom! Score! 

ORC House Plus Love Room Update

Holy moly what a week! I can't wait for the next! I meet with the seamstress once again to make a drop off and get to pick up some finished pretties! I am also tackling painting the dresser this week! Say a prayer for me on that one! Stay tuned and join me next week as we continue the journey! Be sure to check out this week's designer posts from One Room Challenge!! There is beautiful things happening!! And also check out this weeks link up with the guest participants! Until next time! 


One Room Challenge- Plan, Paint, and Hardwood Floors!

Hey y'all! I can't believe it is week 2 of the One Room Challenge! It is time to give you an update on where I am in the process of transforming my parents new guest bedroom! You will remember last week I shared the before pics, which takes you on a time machine ride back to the 70s! Oh that pink carpet! Well you can go spread the good news...the carpet is gone! Out with the old and in with the new! All of the multi-colored carpet in the upstairs bedrooms just had to go! My mother did finally decide to go with carpet in her bedroom because the room is large and she wanted a softer feel.  But for the rest of the upstairs, including the guest bedroom, we selected a hand scraped engineered hardwood from Lowe's.  You can find it directly through this link!  We were even able to get a quantity discount due to the square footage we ordered...but you have to know to ask for it!! Hint Hint! We had these beauties installed by professionals! Because let's be honest, ain't nobody got time to deal with that square footage! 

ORC Room Update- House Plus Love

This week I also took on the task of painting all the trim in the space.  I am a bright white trim kinda gal.  I feel strongly about it!  I can totally get behind the idea of a fun colored trim in the right space, but otherwise WHITE! My favorite paint to use for trim is Behr from Home Depot.  I use Ultra Bright White in high gloss.  I am also a GLOSSY girl...the glossier, the better!!! Make it SHINE! And a little secret about me...I am a pretty darn good painter.  I try to keep my talents close to the chest and only break it out for myself and...my momma.  

Here are a few of my painting tips: 

  •  You need to invest in a really good brush! Like for real.  I will ONLY use a Purdy paint brush. You can find my favorite through this link! It is important to have the right tools to get the best results! 
  • Primer can helpful to lessen the look of brush strokes! I don't always use it, but have noticed a difference when I do! 
  • Paint your trim FIRST! Start with your primer and 2 coats of trim paint (high gloss white in my opinion).  This helps you be neat and not worry about getting it on the walls.  Come back and trim out your wall color after your trim coats have completely dried.  I have discovered that it is easier to cut in on your walls neatly after your trim is finished! This way when painting both your trim and walls, you don't have to use tape! 
  • You really need to have a steady hand.  This is tricky because some people just don't got it! If you don't, no worries...just stick to rolling and call over your steady handed friend...just not me! Hahaha! 
  • Again, invest in the best rollers.  And get yourself a roller extender!!! This one is my favorite!! It adjusts to several different lengths!
  • You can line your paint pan with plastic grocery bags or a trash bag so you don't have to waste so many plastic liners!! 
  • You can also use plastic bags to cover your rollers or brushes in between coats so they don't dry out! Boom!
ORC- Paint House Plus Love

Along with getting the walls and floors knocked out, I also spent some time getting organized! The more and more renovations I do, I realized there needed to be a place for a design savvy homeowner to organize and record their selections they make along the way!  SOOO...I got to planning and designing and created the House Plus Love design planner for the home! It has been a game changer in the way I plan and create a space...not only in my business, but in my own home!  I now have a place to jot down my measurements, paint selections, fabric, furniture, budget, and the list goes on and on! So this week, I grabbed my mom's personal HPL binder (she's got the hook up) and got to tapping and recording all the plans we had nailed down! She and I will now have a reference for our selections as we plan and a keepsake for the future! 

ORC House Plus Love Design Binder

Speaking of nailing things down...the fabric I chose, was not only one of the inspirations of the space, it will MAKE the space! I loved it so much after stumbling upon it at my favorite local fabric store, Richtex's, I decided to have custom euros and a matching bed-skirt made! After a quick consult with my seamstress, the fabric was cut, bought, and in the process of being turned into a beautiful custom creation!! Here is the direct link to the fabric! This is actually Richtex's online store...right here in Alabama!! 

ORC House Plus Love Fabric and Headboard

Holy cow! That was a lot!!! Thanks for following along on this journey!! Be sure to follow the rest of the fun with Calling It Home and stalk the hashtag #oneroomchallenge!! Here is the direct link to this week's link up!! 

One Room Challenge - Guest Bedroom Before and Plan

Hello friends! Everyone loves a transformation, and boy do I have one in store! I am so excited to be a part of the One Room Challenge this Spring season!  Created by Linda of Calling It Home, the One Room Challenge is a biannual event where 20 invited design bloggers are asked to transform a space over the course of 6 weeks and share their journey of the process.  Linda is so nice to also allow guest participants to join in on the fun too!  I love a challenge...so as soon as I heard about the opportunity, I was all in!!  So over the next 6 weeks I'll be sharing every Thursday as a guest participant! HERE WE GO...

So what space have I selected, you ask??  As some of you may know, my parents purchased a new home the week after Christmas a few months ago!  The home has such great potential, but like my own home, it needs a little LOVE!  We have been working on their new home for what feels like everyday of my life for the past 4 months! We still have a little more to go, but oh so close! So for the One Room Challenge I have decided to transform my parent's guest bedroom! It will also serve as MY bedroom when and if I ever spend the night with them, making it a natural choice! 

one room challenge before

So let's take a look at where we are starting! These pictures are from the first day we stepped foot in the house.  The room has no overhead lighting and with the window positioned upstairs under the tall front porch, it makes the space feel dark and dated.  The carpet we believe is original to the 1970's home.  Pink, it is the most awful shade of pink.  Don't get me wrong, I have a hot pink rug in my bedroom at home, but this is NOT okay.  It also has a huge bleach stain in the middle of the wonderful pink carpet.  To make it even better, every room in the upstairs has different colored carpets.  Needless to say, all the carpet is going!  The room does have the best view in the house with one large window facing the large front yard! It also boasts 2 closets! I am sure my sister or mom can find something to fill them with! 

one room challenge society social inspiration

I want the space to have a fun fresh feel! And my inspiration came from Society Social's gorgeously styled room! As soon as I saw this space, I said "That's it!" and then texted my mom to get her reaction.  She loved it and gave her approval!  So the design for her new guest bedroom is a go!  And now for the design PLAN...

one room challenge design plan

I am going to start by painting all the trim and doors in the space to a bright white! I think that will make it look bright and fresh! I am okay with the current cream walls.  They were painted professionally recently in the color Divine White by Sherwin Williams.  We are then going to have beautiful hardwood floors installed in all the rooms and hallway upstairs.  Next comes the fun part...furniture and accessories! I have found some super cool pieces that I can't wait to share with you! I am so excited about the coming weeks and what I have in store! So join me here on House Plus Love every Thursday as I share more about the process and transformation! 

And be sure to follow along with the featured designers (listed below) in the One Room Challenge! They post to their blogs every Wednesday! And you can follow @callingithome on Instagram and stock the hashtag "oneroomchallenge" to keep in the loop on ALL the fun!! Follow along with the other guest participants by visiting Calling It Home's blog here! You will be able to view the whole linking party!! Hooray! 

ORC Graphic


Source: http://www.shopsocietysocial.com/pages/sho...

How to add LOVE to your workspace and make it inspire you!

I attended Stationery Academy back in March of this year in New Orleans and it has greatly changed my life and business! Since then I have gotten back to my WHY! Why I do what I do and how I can help others with my talents and thus, House Plus Love was born!  I have a passion for interior design and helping families create beautiful spaces that they love and can call home! So today I am sharing with you some ways to add some love to your workspaces to help you feel inspired and focused to create! 

As an entrepreneur myself,  I have been working from home for the past 4 years.  Before taking the leap into self employment, I worked in several office environments, design firms, and even one basement!  But there is nothing quite as rewarding and frightening as being the boss and creating in YOUR own space!  And as a creative, our brains truly thrive in an inspiring environment! So let’s make your office space stand out from the crowd and get your creative juices flowing! 

TIPS TO HELP YOUR WORKSPACE INSPIRE YOU:  

- Keep it neat and clutter free. This one might be a no brainer, but is true!  Creative minds can often be messy minds!  And hey, there is nothing wrong with that!  I must admit that my workspace is often a bottomless pit where things go to disappear and die.  Even as I type this, the task “clean office”  has been on my to-do list for days now.  So please know I am preaching to the choir here!  But I know that my mind seems to create better and stay on task when I have a tidy desk to work from!  Use smart storage solutions to give everything a place.  If it has a place, you might be more likely to keep it there.   Before you close up shop for the day, spend a few minutes tiding up.  That way you begin each day with a fresh start and perspective.  Keeping your workspace clutter free will hopefully give your desk and mind space to create new and exciting things! 

- Add in some love and personality!  Your workspace needs to be a direct reflection of you and your personal style.  What are your hobbies, your interests, passions?  What is your favorite color?  All of these questions can be contributing factors in what you choose to include in your space.  I believe that the best workspaces put on display the heart behind the maker!  Think of the walls and counters of your workspace as a “Brand Board” for yourself.   Just as you began creating your brand or business by reaching deep into your WHY, think of your workspace in the same way!  Gather colors, fabrics, artwork that play into your interests and inspiration and you will have a workspace that is not only beautiful, but inspires you as well!  Don’t be afraid to show your personality.  I like to call it, “Adding LOVE” to a space!  Your workspace should be the best place for you to let your personal style ring true! 

- Put Your Dreams on Display!  Consider things that inspire you, that fuel your creative juices and make them visible!  Goals and dreams are something that we talk about often as creatives!  And I think having these dreams on display is very important! Something that I have started doing this year that I learned from Stationery Academy is actually writing down my BIG DREAMS and keeping them visible! My next step is going to be to create a lovely print and make sure it is front and center every day!  Oprah herself also highly encourages this practice and she calls them “Vision Boards”! And by all means, if Oprah says do it, you perk up and listen!  The purpose of these vision boards is to remind you of your goals, to keep you on track, and keep you inspired! Hang a bulletin board in your workspace and tack things that inspire you, that encourages you, but also pin up your dreams!  There is no better motivation for your week then to look up and see what is possible for yourself and your business! 

These are just a few ways for us creatives to get the most out of our workspaces! Start to view your office as a tool to help you create and thrive rather than a burden! I hope that you found these tips helpful and can start implementing a couple of these today!