Blood, Sweat, Tears, and a lot of WOOD.

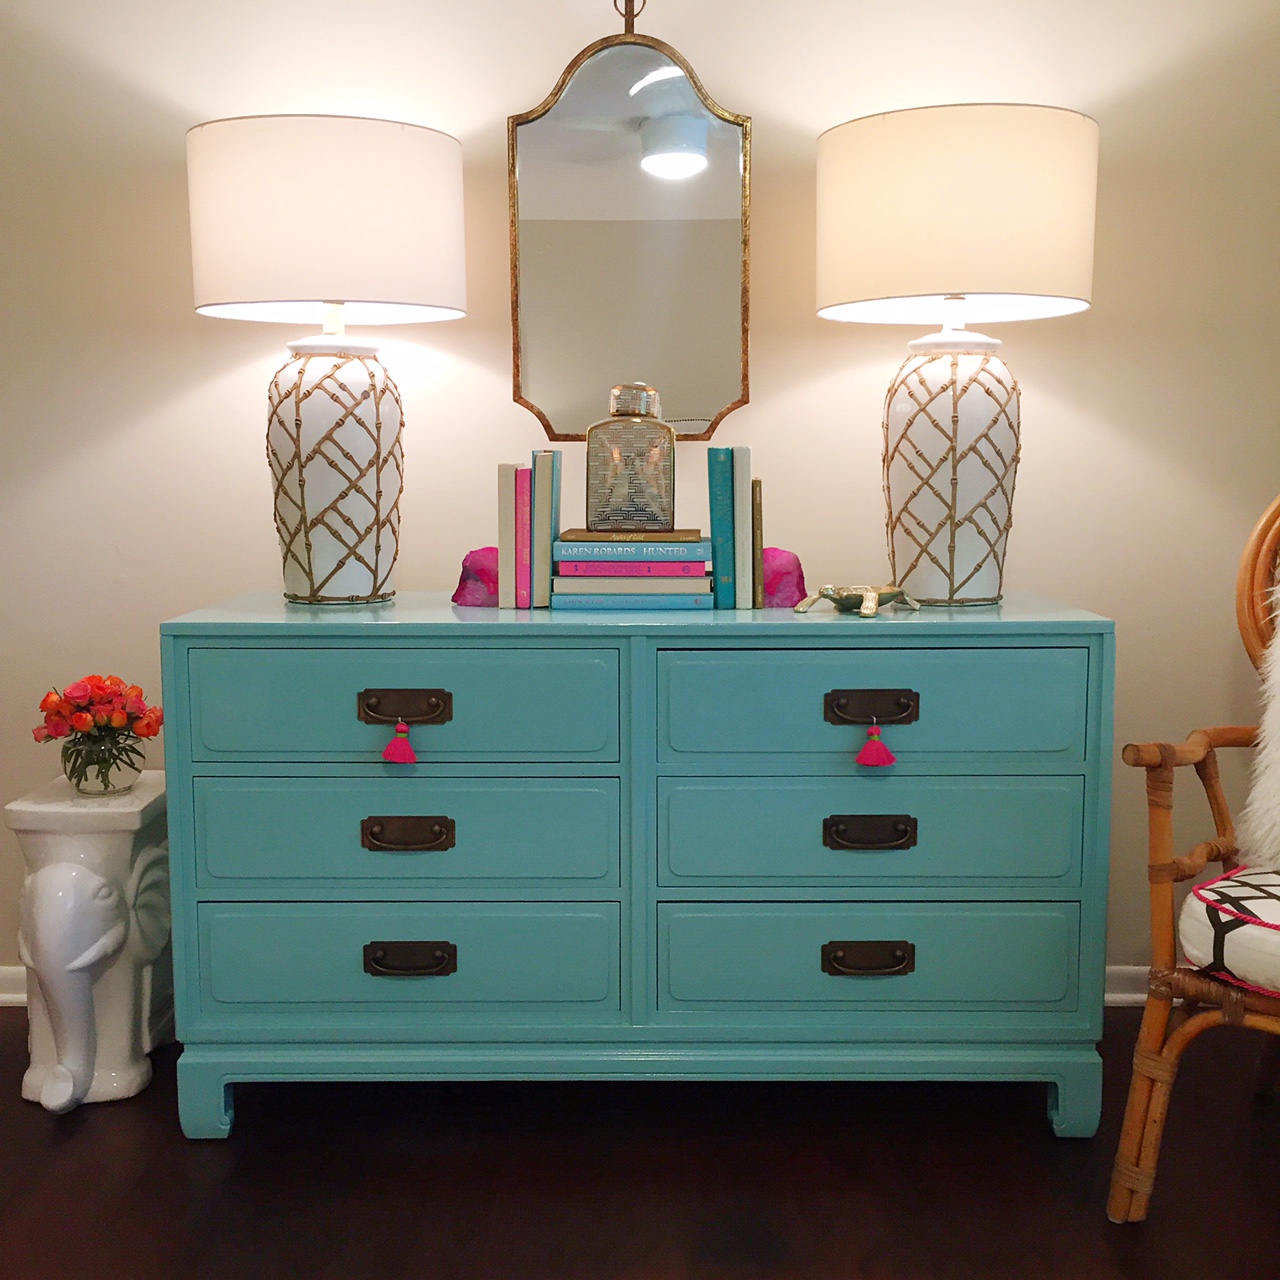
Hello there friends and happy new year!  It's a new year, new me, new products, and a new blogging schedule!  How does a weekly edition sound?!  I'm also working on bringing you some vlogging...that's video blogging for you behind the times folks!  There are so many exciting ideas and things I plan to share with you this coming year!  So let's get started with a before, before, and after.  You see, my back deck has gone through not one, but 2 major renovations.  Yep, you read that right...two.  Mainly because I am crazy and apparently not happy unless I am tearing out something and redecorating within my home.  Surely I am not the only one. 

I purchased my home which I now lovingly call the House Plus Love house, way back in 2012. You know, way back when in the good ol' days.  Back then the wood deck on the back of the house was as the home inspector called it, "condemned".  As in "no one should be allowed to step foot on this thing or they will die" type of condition.  So naturally it is one of the first things that we attacked with a sledgehammer.  

Once all the old and rotten wood was torn down and hauled off, we got to work on the new creation!  Like most of my wild ideas, the design was sketched out and discussed in detail with my Dad over dinner and a napkin.  After we nailed down the design and got my talented mom's stamp of approval, my Dad and I got to work on fabricating the new design.  We enlisted a little help with the initial setting of the large 6x6 posts, but after that it was all us!  I think some are shocked to know that I actually know my way around a power tool or two!  After a quick lesson from my Dad, I myself: cut, set, and screwed in all of the new deck boards.  Girl Power!  

The new deck is 6 foot larger on all sides from the old rotten one.  It also surrounds the large tree that I just didn't want to cut down.  We intentionally included tall posts along the handrails to hold patio lights.  I knew I wanted the addition of patio lights from day one for added lighting and charm.  We also designed (again on a napkin) the swing bed cover after I found and purchased the swing bed.  You can read more about the swing bed design and construction here from my feature in Mobile Bay Magazine.  Here's where we ended up after a month of construction...

So that is where the new deck was back in 2014.  It was a glorious time of fresh wood and landscaping.  But you see, nature has this funny way of making new wood look less than stellar in a few short years.  So fast forward to Fall of 2016 (just a few short months ago)!  I knew it was time for a deck refresh!  The wood was sad and worn and the furniture had seen better days.  And let's be honest, I wanted to design something again!! I wanted fresh new colors and a more uniform feel!  So I decided I wanted the look of painted wood and finally settled on painting the wood a dark gray (the same color as my shutters Benjamin Moore, Chelsea Gray). I think that color was a great neutral base and backdrop to add in pops of more bold colors.  The fall is also the perfect time to purchase outdoor furniture because it is all on sale!  I first stumbled across the french bistro style dining chairs and navy umbrellas from World Market which officially decided my color palette of navy, white, and turquoise.  Next came the Ikat outdoor rug from Target, faux turf rug from Ballard Designs, and white and navy rockers from Lowe's.  Lastly, Dad and I finally finished decking in the lower portion of the deck where no grass would grow and closing in the bottom of the deck with horizontal boards.  The closed in area below now allows for some added exterior storage for extra patio furniture and pots.  And the horizontal boards add an extra modern touch.  We then added the metal farmhouse lights to add lighting to the lower deck...the perfect touch of charm! 

I love this outdoor space so much and use it frequently!  It has added so much square footage to my home and is the PERFECT outdoor entertaining space!  I hope you like it as much as I do! Tune in next time! 

Source: https://www.google.com/_/chrome/newtab?esp...

Join the Brite Lite Tribe

Hey friends! Happy Friday! With a week away, we are in the single digits in the count down to Christmas! I am so excited! I love the Christmas season!  For those of us living in the deep south, it means that we finally get a much needed cool down.  I know nothing of harsh winters, but our summer heats are brutal and winter allows us sometime to slightly forget how hot it gets here!  Blahaha!  It's also a time to spend with family and friends cuddling and making memories.  AND it is a time of gift giving...and this girl loves some gift giving!  Speaking of...I hope that you found our House Plus Love gift guide helpful in your holiday shopping this season!  I loved putting that guide together and y'all seemed to love it too, so that will for sure be a new annual addition to our blog!  For those of you who are late shoppers and are still searching for a unique and precious gift, I thought I would do a little more up close review of a popular item from our gift guide! Drum roll please...the Brite Lite Box!  

The Brite Lite Tribe is a super fun new brand that provides a colorful selection in neon lights and brite boxes!  I'm an 80's baby.  Anybody else remember the glory days of Lite Brite!?!  Well, the Brite Lite Tribe is your 80's and 90's loving dream of today!  This light box is my childhood dreams come true...exactly what my 80's heart wants in a light box as an adult!  It comes in several colors and allows you to illuminate your expression!  With letter packs in multiple colors, emojis, and symbols, your options in lighting up your thoughts are limitless!

I joined the Brite Lite Tribe and have used mine to add even more spunk to the new House Plus Love office!  I am even planning on incorporating it into my artwork and hanging in on the wall. Wouldn't that be such a cute addition to the gold dotted walls!  But also how cute would the Brite Lite Box be as a night light for your kiddos!?! I think this light box is perfect for all ages!  

If you think the Brite Lite Box is just as cool as I do, then today is your lucky day!! For one, we are hosting a GIVEAWAY over on our House Plus Love Instagram!! You could be the winner of your very own Brite Lite Box!  The winner will be announced Sunday so go enter to win! Secondly, the Brite Lite Tribe is offering the House Plus Love readers a little special coupon code for 10% off your order!! Use code: WINTER10. Hooray!! So go check out the Brite Lite Box and join the tribe!! 

Source: https://brittany-fleming-8vou.squarespace....

House Plus Love Gift Guide 2016

The holidays are upon us friends! Time to check our list and check it twice.  And with today being Cyber Monday, it is the perfect time to share our gift guide for this year!  Our gift guide is perfect for the stylish lady in your life! It represents all the things we love and a few small and mighty companies that we love to support! 

Source: https://brittany-fleming-8vou.squarespace....

One Room Challenge - The BIG Reveal - Week 6

Well here we are.  We made it.  We made it to the end of the One Room Challenge.  We made it to the end of the election.  I have no words for the later, but what better way to brighten our spirits than being uplifted by the beautiful transformations that have taken place within so many homes over the past 6 weeks!  Hats off to all the participants this season!  The spaces are so inspiring!  If you are just tuning in, welcome! You can play catch up by following our journey here: WEEK 1WEEK 2WEEK 3WEEK 4, WEEK 5.  If you have been following along with me since week 1, thank you oh so much!  Your visits, comments, and encouragements mean the world to me!  Aww tear...okay moving along, y'all came here for a REVEAL after all, right?!

Let's jump into our DeLorean, and go back in time to the before... 

Not too shabby, just a little dark and lacking spunk!  So I put a plan together to create a more bright, happy, and inspiring space to work in and dream up new spaces for others!  Here is the plan I put in place...

And now are you ready for the AFTER?  AHHHH. Crowd goes wild! AHHH...oh sorry, never mind.  Here you go...THE REVEAL!

SOURCES:  Wallpaper from Target | Rug from Overstock | Desks from Overstock | White Console from Ikea | Legs from Pretty Pegs | White Shelves from Ikea | Gold Lamps from Homegoods | Frames from Target | Beach Prints from Teil Duncan | Coral from Homegoods | Staffordshire Dogs - vintage | Flamingo print from Thimblepress | Gold Alabama State Print from Thimblepress | Gold hello from West Elm | Wire B from Hobby Lobby | Collection of Pineapples - vintage | Pineapple Print in gold frame from Zulily | Pineapple artwork from Homegoods | Draperies from PB Teen | Gold Rods from Bed Bath and Beyond | Multi Color Leopard Print Pillow from Clairebella | White Double Lamp from Homegoods | Gold Dog Tape from Target | Pink Heart Ottoman from Target | Boxwood from Geranium Street Floral | Turquoise Chair - vintage | Pink Bar Cart from Homegoods | Chandelier from Creative Co-Op | Floating Gold Frames from Target | Gold Foil Art Prints from Scarlet and Gold | White Cubbies from Ikea | Brush Stroke Lamps from Homegoods | Colorful Tray from Lifeguard Press | Monogram Notepad Set from Emily McCarthy | Scripture Card Sets from House Plus Love | Gold Bamboo Frames from Framebridge | Flamingo Art from Homegoods | White Giraffe from Homegoods | Pink Gem Speakers from Bando | White Console Table from Overstock | Fur Stool from Ross Stores | Gold Pineapple Pillows from Lifeguard Press | Pink Monogram Lamp Finial from Moon and Lola |

" A house plus love equals a home."

Thank you to Linda of Calling It Home for creating such a wonderful event and encouraging us all to join in!  Be sure to check out all the guest participants' final spaces!! SOOO many good things y'all! And lastly, be sure to check out this season's participants!  Their final reveals are unreal and so inspiring!  

Jana Bek | Chris Loves Julia | Shannon Claire | Coco.Kelley | The Curated House

Driven by Décor | The English Room | From the Right Bank | Sherry Hart

Hi Sugarplum | House of Jade | Hunted Interior | The Makerista | Making it Lovely

Marcus Design | Pencil & Paper Co. | Megan Pflug | Place of My Taste | Suburban B’s

Waiting on Martha  Media Partner House Beautiful | TM by CIH

Photos by: Stuart Sox

Source: https://brittany-fleming-8vou.squarespace....

One Room Challenge - The Home Stretch, Pun Intended

Week FIVE, the HOME STRETCH! And yes, the pun was very much intended.  If you live in a hole or maybe you just aren't the sports type, I'll fill you in with regards to the pun.  The Chicago Cubs won the World Series last night after being shutout of the honor for 108 years. So week 5 is very much THE HOME STRETCH!  It is the time that the One Room Challenge participants start to really feel the pressure.  This is it people.  Next week we all pull the curtains back and reveal our marvelous creations!  And if you have really been living in a hole or this is your first time popping in on House Plus Love, I'll fill you in again.  Today marks the fifth week of the One Room Challenge which is a SIX week design challenge where designers and bloggers tackle one room in their home!  I have been taking on the task of revamping my home office!  If you would like to take a peek at our progress over the weeks you can click here:  WEEK 1WEEK 2WEEK 3, WEEK 4.  And now you are officially "filled in".  

So let's get started with some organization!  For every project I tackle, for myself or for a client, I start with a plan and my planner!  I created the House Plus Love design planner last year after years of using the same system in several residential and commercial design firms!  I realized that this tool, that most designers use to keep their client projects organized, could be simplified and used by the design savvy homeowner themselves!  The House Plus Love design planner was born

The planner is divided by room, and begins each section with a space for your inspiration photos.  Here is a look at what my inspiration print out looks like for this fun office!  I printed out this beauty and taped it into place on my inspiration page as I began to make decisions on the space! 

Next up, I took measurements of the space and sketched out the floorplan of the room.  I also penciled in my initial idea for furniture layout and placement.  Then there is a place to record your existing furniture that you plan on using again or re-purposing in the new design.  In this case, I had a couple pieces that I knew I wanted to use again even if in a different way.  For instance, my high gloss white LACK Ikea bookcase I planned on turning on its side and using it as a console. For those Ikea connoisseurs out there, you'll know that the LACK bookcases are THE original! Blaha! Therefore in this section, I was able to store the existing furniture information and dimensions.

The remainder of the pages provide spaces for you to store and record your new selections for the space including: paint, wall-coverings, furniture, lighting, accessories and more!  I took the time to take note of the key pieces I knew I wanted to showcase in the new office.  I didn't want to forget those important decisions I had made while planning and the vendors I wanted to include! For instance an adorable pillow by Clairebella Studios, artwork by Teil Duncan, prints by Thimblepress and Scarlet and Gold, and custom finials by Moon and Lola!  So there you have it, my very organized design planner that keeps me focused when working on a new space!  You can find our House Plus Love design planner right here

Next up in the land of progress is a little story about a desk.  If you are a faithful follower like me of Sugar Paper, you'll remember that back over the summer they released an office collection that included a very beautiful white and gold desk! 

Isn't it a stunner!  We were warned that they would go fast and that they would released at some ungodly hour in the morning.  So of course what's the reasonable thing to do?  Yes, you stay up all night and into the next day through all the technical difficulties, and order said desk. I was so thrilled! I knew at some point I would be redesigning my office and I was off to a good start with a beautiful desk on its way!  To add to my good fortune, somehow in the technical madness, Target made a 5 minute mistake in the price of the desk and incorrectly listed it for $249 (originally $399).  I somehow managed a Cubbies win the World Series luck and scored the desk for $150 off.  You can imagine my excitement.  Cue the confetti!  That's about when my good fortune took a nose dive into the ditch.  After a backorder notification, my desk finally arrived in August.  I was so excited!  I had scored the desk for an amazing price and now it has arrived giving me a slight edge in what I know sits around the corner...this One Room Challenge.

I'm sure the underpaid laborer in China who packed this beauty wished they could have seen the smug look on my face with all my beaming pride.  Because what they knew that I did not is that, they had not taken the care needed when completing their task of: PACKING THE DESK PROPERLY!  Of course, my excitement quickly turned to disappointment when I discovered the desk was crushed.  CRUSHED.  Beyond repair.  Let me just take that straight to the dumpster for you Target. But no, I contacted the trusted customer service department and fought through the frustration and language barrier to get a return ticket and be placed on a wait-list for a replacement; because I'm the kinda girl that gets things done!  Insert eye roll.  Yelp it's November, and finally got notification that the sacred glossy white and gold legged goddess is headed my way.  Which is fantastic! Except, confession time: I already had my professional photos taken of the space last week. You heard me right, my photographer friend happened to be in town and I booked him asap! Then I ran around like a crazy person, cried, and kept asking myself WHY, why did you agree to this!  But now I have some gorgeous shots to share with you next week (BUT WITHOUT a shiny new desk) and I can't WAIT! So I'll leave you with a itty bitty sneaky peaky!

YAY! Alright everybody there you have it!! Another One Room Challenge is almost in the books! BE SURE to come back next Thursday for the BIG REVEAL! I'll show you everything and give you all the sources! You are NOT going to want to miss this! 

Be sure to follow House Plus Love on Instagram and check out our Instagram stories to stay in the loop with our progress and all the "going-ons"! Also stop by the One Room Challenge participants as they share their transformations!  I am SOOO excited about these spaces!  And be sure to also check out the other linking guest participants for even more renovation goodness!! I can't WAIT to see everyone's reveals!!! See y'all next week! 

One Room Challenge - Yes A Boxwood Wall...

Hello there friends!  We have made it to week FOUR of the One Room Challenge!  If you have been checking in with me every week, thank you so much for following along!  And if you are just tuning in, you might be wondering what all this One Room Challenge talk is about!  It is a 6 week challenge for design bloggers to tackle and FINISH one room within their home or client's home!  It is such a fun experience and the cheers and motivation from the One Room Challenge community is fantastic!  For this fall season, I am taking on my home office!  The goal is to transform it to a fun place to work and feel inspired!  You can check out our previous posts here and get yourself up to date on all the progress...WEEK 1, WEEK 2, WEEK 3.  

Let's take a little trip down memory lane to check back on where we started!  You remember the before...

Not too shabby but cluttered and heavy feeling!  I wanted a work space that had a more bright and happy vibe!  So here is the design plan that I put together!  

You'll remember that I have already tackled the wallpaper in week 2 and 3...so WEEK 4 brings us to another large design element in the space...the boxwood wall.  Yes, you heard me correctly, a BOXWOOD WALL.  Now don't go all crazy on me, it is a FAUX boxwood so no watering necessary!  It is basically sheets of plastic hedge that is most often used in commercial or hospitality applications for privacy or added interest.  In layman's terms...you know that fake plastic bush stuff that hotels sometimes use for privacy for the pool...yeah that stuff.  Well I'm crazy enough to think, "hey that would be cool on my wall!".  The idea first came to me due to my little side gig with Lifeguard Press!  I am apart of the Lifeguard Press trade-show setup team which has the BEST trade-show booths that are designed by the wonderfully creative Natalie Chang.  For a portion of the booth space, we install this boxwood for a dramatic wholesale display!  I have always loved it and since I was experienced in the handling and installation of the product, it made the decision to GO FOR IT that much easier!  So 3 boxes of plastic boxwood were ordered and shipped to my house!  

It comes in 20 inch square sheets that fit together with tabs and can break down into 4 smaller squares that are 10 inches.  Does that even make sense?! If not, refer to the photo provided below! 

If you start at the top of the wall and work your way down, you can let gravity do a little bit of the work.  Using a staple gun (I used my Craftsman with 9/16 staples), simply staple to secure to the wall.  With your next piece, you'll be able to attach the squares to each other using the tabs.  This will keep the square positioned long enough for you to staple into place.  Using the tabs to adhere each square keeps you from having to use as many staples into your wall.  If you are covering a wall with windows, doors, or a wall that is simply NOT an easy square; you'll be left with some awkward spaces to cover.  But no worries!! The sheets can easily be cut with household scissors to any size to fit your needs!  (Did that sound too much like a sales pitch?!) Once you have all the pieces stapled into place, you might need to "fluff" some areas to appear fuller!  And remember it's "boxwood" growing on your wall, it isn't going to be perfect! (Wink!)

And there you have it!  Me and my crazy idea for a faux boxwood hedge on my WALL! How about a little closer sneak peek...

Join us here next week on House Plus Love...oh sorry.  But really, next week I'll be sharing some sources, a little tale of the invisible desk (that's right folks, a desk I ordered in July still isn't here), and how I keep projects like these organized!  And then on Week 6...the BIG REVEAL we have ALL waited for!!! 

Be sure to follow House Plus Love on Instagram and check out our Instagram stories to stay in the loop with our progress and all the "going-ons"! Also stop by the One Room Challenge participants as they share their transformations!  I am SOOO excited about these spaces!  And be sure to also check out the other linking guest participants for even more renovation goodness!! See y'all next week! 

One Room Challenge - We're Halfway There!

Hey y'all!!  Can you believe that it is already week 3 of this Fall round of the One Room Challenge!  Holy moly it is flying by!  If you are just tuning in, the One Room Challenge is a 6 week design challenge that encourages design bloggers to completely transform a space within their home!  It is a great motivator to get things DONE and have so many help cheer you on!  If you missed our previous posts, you can find WEEK 1 here, and WEEK 2 here.  

Now let's chat about where I am at this halfway mark!  This week included a lot of boxes full of fun things showing up at my door!  Which always makes me giddy...it's like Christmas morning every time I open my door!  New boxes means progress! 

I was also able to completely finish installing the spotted wallpaper!  Once I got a system going, it started to go fast!  I don't want to give too much away...but it is BEAUTIFUL!!! I am so in love! So check that off the list!  The boxwood wall is still in progress!  I have a few pieces up and I am loving the unexpected look!!  A little confession: I ordered enough wallpaper to cover all 4 walls just in case I didn't love the boxwood.  Well after a few pieces up, I'm hooked!  And it even got my reluctant mother on board too!  She is always my sounding board for design (let's be honest...she's my sounding board for EVERYTHING).  She has amazing style herself but sometimes she gives me a few eye rolls for my out of the box ideas.  But this one won her over! I can't wait to share!! 

So this week has been a great week of PROGRESS!  However sometimes to reach a beautiful after, you have to create a MESS!  It has to get worse before it gets better!  So let's get real for a second.  Here's an honest update on my space...

Yikes! So pretty things are coming and progress is happening, but this honestly is exactly what my office has looked like this entire past week.  But I will make you feel a little better (or maybe me)...I cleaned it all up yesterday and tonight it is 10 times better!! I don't want to spill too many beans, but I'll leave you with these promising photo updates! 

Be sure to follow House Plus Love on Instagram and check out our Instagram stories to stay in the loop with our progress and all the "going-ons"! Also stop by the One Room Challenge participants as they share their transformations!  I am SOOO excited about these spaces!  And be sure to also check out the other linking guest participants for even more renovation goodness!! See y'all next week! 

One Room Challenge - Wallpaper Spot Check!

Hey y'all!  Welcome to the second week of the One Room Challenge! Is it just me or has this week FLOWN by!  Thank you all so much for checking in with me last week as I kicked off another round of ORC!  I so appreciate the sweet comments and encouragement!  If you are just tuning in here at House Plus Love, last week was the first week of the biannual One Room Challenge event where design bloggers transform a space of their choosing in 6 weeks!  You get to follow along as the spaces go from dramatic before and afters!  How exciting!  I announced last week that I will be tackling my home office!  I am so excited about this one!  I am looking forward to my own "after" with a bright and cheery office that will help me cultivate some inspiration!  Let's take a look again at the design plan I have put together...

One of the biggest elements in this space is the wallpaper!  I have been wanting to incorporate wallpaper into my home for some time now!  Wallpaper is BACK my friends and in a big way!  I have always had a love of wallpaper.  I remember as a child, roaming the aisles with my mother of a local wallpaper superstore!  They had every patterned paper you could imagine!  I would get lost in the countless rows and daydream about how I would use my favorite designs one day in my home.  That wallpaper extravaganza has since gone out of business, but it's inspiration has never left me!  So one of the first things I searched for when considering redesigning my office was a wallpaper.  After exploring my options, I loved the idea of using a "temporary wallpaper".  Over time and with a little ingenuity, wallpaper has taken an evolution and the thought of a removable or temporary paper was born!  It is a fabulous idea in my option because it allows for an easier installation, no serious commitment, and it doesn't damage your walls!  Sign me up!  So once I found this gold spotted beauty from Target, I knew I had found "the one"!  It is by Devine Color in pattern Speckled Dot in color Karat.  The pictures don't even fully do it justice.  The pattern and gold shimmer is just beautiful in person! 

This week I was able to get started on the installation process.  It has been fairly easy to install as well! Here's a little how-to on the process: 

  1.  My walls are 8 ft tall.  I was able to get 2 full drops out of each roll.  I'll only be covering 3 walls in my space and luckily my office isn't too large of a room.  So it can get costly when covering the walls of an entire room.  
  2. It is best to start in a corner and allow the paper to go about 2-3 inches onto the corresponding wall.  That way you aren't trying to match a pattern in a corner on a possibly not square wall.  I mention this because I learned the hard way.  However if you are only covering one accent wall, then this wouldn't be necessary. 
  3. When placing each drop, allow the paper to extend about 1 inch onto the ceiling.  You will later trim around the ceiling or crown molding and the base molding with an Xacto blade. 
  4. Peel off about 4 inches of the backing and then carefully position into place.  Do not peel off the entire backing!  YOU WILL LOOSE YOUR MIND!  The key is to go slowly and peel off the backing as you go! 
  5. Use a stiff card (a credit card will do), to rub the paper onto the wall.  It will stick well, but can always be taken off to reposition.  Start in the middle and work your way to the edges, smoothing out any bubbles as you go.  If there are too many air bubbles, it is best to peel off and try to smooth out again.  It takes patience! 
  6. After each section you secure to the wall using your card, peel back another section of the backing to continue the process.  
  7. Lastly, carefully trim your extra along your ceiling line and baseboards! 
  8. Luckily the spots in this pattern are very forgiving when it come to pattern matching!  I could see where a more geometric pattern would take more time and patience!  This pattern also has a huge repeat!  That has been a little frustrating because it has caused a lot of waste!  But overall, I am very happy with the finished product!! 

Okay so now I need to go finish the last wall!!  The current state of the office is honestly scary!  I'm starting to question how I'll get it all done, but that deadline is coming and it will come together!  I have big hopes for this weekend!!  Fingers crossed!  

Alrighty friends, thanks for checking in this week!  I'll be back next Thursday will more to share! I'm also working on blog posts about my deck renovation, my experience with finding mold in my home, and some more fun before and afters!  

Be sure to follow House Plus Love on Instagram and check out our Instagram stories to stay in the loop with our progress and all the "going-ons"! Also stop by the One Room Challenge participants as they share their transformations!  I am SOOO excited about these spaces!  And be sure to also check out the other linking guest participants for even more renovation goodness!! See y'all next week! 


One Room Challenge - Office Before and Plan

Hey there again!  Cue the confetti, it's that time again! It's time for another season of ONE ROOM CHALLENGE!  In the past season you'll remember that I took on the task of transforming my parent's guest bedroom.  However if you are new to the House Plus Love blog, then scroll down a few posts and you can read all about the journey...from painting vintage furniture, design organization, and more! 

So are y'all up for a new challenge? This season I have decided to tackle a space in my very own House Plus Love home!  Over the next six weeks you can follow the process as I redecorate my HOME OFFICE!  I am super excited about this one!  I have been wanting to redesign my office for quite some time.  I work from home, so it is a space that gets a lot of use.  However, lately it has become a "catch-all" space that I don't seem to use much for "working" and I want to change that!  My goal is for the space to become inviting, organized, and FUN!  I am hoping for a work environment that inspires me and fully embodies the House Plus Love vibe! So let's get started shall we! 

First things first...the BEFORE!  Full disclaimer...I am an Auburn University graduate, so when I moved into my home, I thought that a nod to my Alma Mater would be just the ticket.  Cute huh?  Well, that orange and navy situation has run its course for me.  Don't get me wrong, I LOVE orange and navy...I'm just tired of staring at it.  So here is the not so bad before! 

Now that you have seen where we are starting, let's talk about where we are going!  Here is the design plan I have put together for the updated space! 

OMG what a difference! I am so excited for this one!  My new office is going to be so bright and cheerful!  I can't wait!  So check back here with me every Thursday for the next six weeks to watch the journey unfold! 


Be sure to check out the Designer Participates of the One Room Challenge every Wednesday at Calling it Home! There are so many exciting names, I can't wait to see what everyone will do! And it is always so fun to check in with the MANY guest participates, like myself,  who post every Thursday through Calling It Home! Check out these rock-stars here

Yay!! Let's do this! Help me cheer on all the One Room Challenge participates!! 

One Room Challenge - The Final Reveal!

Hey y'all! Well, we made it! After six weeks of planning, painting, designing, shopping, placing, fluffing...we have finally reached the big reveal! This has been an exhausting last couple of weeks but also incredibly rewarding! It was just the push and motivation we needed to get at least ONE room in my parent's new home FINISHED! I am thrilled with the results and better than that, my client (aka my mother...dad's opinion doesn't really count) LOVES IT! The last two days, as I was finishing up the space we just sat in the room and stared at its beauty! It is the perfect blend of my personal funky style, yet sophisticated and clean for my mother!  So for one last time, let's do a little flash back to where we started...

Oh man, I am SOOO glad we have moved on from that space!! After gathering inspiration, I settled on a colorful resort vibe! I mean, since it will be MY room when I stay over, I thought I should pretend I was on vacation! Mom gave her blessing and we were off to the races! Here is the overall plan I came up with for the transformation..

Several things changed since the creation of this vision board and several things changed last minute, but overall I think I was able to capture the overall vibe! You have waited 6 weeks for it and here is where we ended up! Drum Roll please....time to REVEAL!

SOURCES: Dresser - Vintage, Local, and Painted at Southern Antiques and Accents // Chair - Vintage and Local at Kaglen's  // Lamps - Vintage and Local at Antiques at the Loop  // Gold Pouf // Flamingo Artwork // Elephant // Mirror - Local at Antiques at Loop

OMG! Well, there you have it!! We have come such a long way! I can't believe the transformation myself! I love this room and so wish it was in my own home! One day when mom isn't looking, I am packing it all up and hauling it to my house!! If there is anything I missed with providing a source, just let me know and I'll be as helpful as possible! 

My first experience and transformation with One Room Challenge has been amazing! I have loved meeting you here every week! I hope that you would continue to keep coming back every week because I am going to keep the renovation train rolling and move right along to my parents kitchen and be sharing the process along with other projects with you weekly! So come join the journey as I add love one space at a time! 

Linda with Calling it Home has outdone herself with this One Room Challenge event and I am now hooked! This certainly isn't my last challenge! But be sure to check out the AMAZING transformations and reveals with the featured designers from this week! And also be sure to check out the other guest participants spaces! There is a whole lot of beautiful spaces happening on the Calling It Home blog you will not want to miss!! 

Source: https://mail.google.com/mail/u/0/#inbox